Can You Fix a Warped PCB?

Before we get too deep into this article, I’ll give you the simple answer. You probably can’t fix warping in your PCB after it’s already been fabricated. You can prevent an unwarped board from becoming warped during assembly, but only as long as materials were selected properly and the board is put into reflow correctly.
We’ll run over some of these points in this article, and I’ll examine some points that might help you recover a warped board. Note that fixing warpage in an unassembled circuit board is an advanced undertaking, and it requires heating and pressing the board above its glass transition temperature. If you’re an individual designer, and you received a batch of bare circuit boards or assembled boards from a manufacturer, there’s no fixing them. It’s better to scrap these. I’ll explain why later in this article.
How to Prevent Warpage in a PCB
Before looking at warpage prevention in a PCB, let’s look at some of the causes of warpage:
- Mixed orientation in a panel: It’s tempting to orient boards such that the orientation in a panel is mixed so that board count per panel is maximized.
- CTE and Tg mismatches between layers: When these values are mismatched, there will be stress buildup on certain layers, causing them to deform and creating warpage.
- Asymmetric stackup: If there is large asymmetry in the layer stack in addition to CTE/Tg mismatches, the asymmetry will place planar stress on some layers, leading to warpage.
- Reflow/wave: Repeated cycling with excessive reflow, wave, and rework cycles can cause warpage to build up. Also, clamping boards can cause warpage during soldering.
These are some of the major causes of warpage in a board that need to be addressed by the designer and the manufacturer.
Design For the Panel Size
Sometimes, you don’t always get the luxury of doing this, but it is important to consider this for purposes of throughput and yield. If you can design your boards such that they do not require mixed orientation, then you will not put yourself at risk of warpage. A mixed orientation of boards in a panel will cause some of the boards to not be oriented along the long axis of the fiberglass strand and the long edge of the panel.
Most of the time this is not a problem. However, if one of the guidelines below is not followed, the mixed orientation could cause some of the boards to be more susceptible to warping. The result is that some of the boards could be warped, while other boards in the same panel will not. If you must design a board while ignoring some of the guidelines below, you should try to orient those warp-susceptible boards so that they can all sit in the same orientation in the panel if possible, i.e., with the long edge of the board along the long edge of the panel.

Match Materials in the Stackup
This is where the designer will have to work with the manufacturer to ensure the board can be fabricated to spec and to ensure the board will not warp during production. If you’re designing your own PCB stackup and you’re mixing different materials, make sure the Tg values and CTE values are compatible with each other. In other words, the Tg values and the CTE values when temperature exceeds Tg should all be similar.
The reason for this is to prevent a general mismatch in CTE values for all of the materials in the PCB stackup. In general, CTE mismatches lead to uneven expansion throughout the stackup that is already known to create reliability problems during operation, particularly fracturing in high aspect ratio vias. The same types of CTE mismatches should be avoided in the stackup design as well.
Use Copper Pour Symmetrically
This is one of those instances where I have seen older designers try to contradict the manufacturers I work with. Copper pour is often cited as the only way to ensure the board will be fabricated with zero warpage. While you can never get to zero warpage, you can get it low enough that the board warpage does not create assembly defects. Copper pour is one of the tools a designer can use to balance copper on opposite layers.
The reality is that copper pour might only be required on opposing layers in the stackup. Just as an example, consider a 6-layer stackup. The image below shows a simple SIG+PWR/GND/SIG/SIG/GND/SIG+PWR arrangement.

If copper pour is used on Layer 6, for example, then you should also use it on Layer 1. If copper pour is not present on Layer 3, then it should also not be used on Layer 4. This makes the stackup symmetric in terms of layer materials and in terms of copper distribution. The important point here is that the copper pour is not required to ensure even heating throughout the stackup or to prevent warping, but if you use copper pour, then you should try to make it symmetric.
This stackup is an extension of an alternative 4-layer stackup but with two additional signal layers. The same design rules in the 4-layer version also apply to this 6-layer version. A good strategy here is to just use the copper pour on the top/bottom layers as power and/or ground as needed.
Limit the Number of Wave/Reflow Cycles
Ideally, the board should only go through two reflow cycles (assuming a double-sided board), and possibly one wave cycle. Some industries will specify a limit to the number of allowed reflow, wave, and rework cycles for a PCB to ensure maximal reliability of the solder mask and to prevent excess stress buildup between layers that can lead to warping. Assemblers already have procedures they use to limit reflow cycling, so as long as the board is built and assembled properly, this can be a non-issue.
Don’t Fix the Board During Soldering
When a board is being assembled, components are first placed and then the board is sent into a reflow oven (for SMT). As the board enters the oven, it heats up to temperature that is generally above the Tg value for most materials (particularly FR4-grade). This causes the materials in the PCB stackup to begin expanding, and they begin to stress each other. The board will expand at different rates in the XY plane and along the z-axis.
The problem can come from expansion in the XY plane of the board. If the board is clamped into a fixtures during soldering and is restricted from expanding, that stress is telegraphed along the z-axis direction due to deformation. This will create more stress in the z-axis direction that can permanently deform the PCB. The deformation will be worse when there is greater Tg and CTE mismatch between the stackup materials. Therefore, do not clamp the board to try and restrict expansion, just allow the board to expand and contract naturally during soldering.
Can a Warped Board Be Re-pressed?
If you’re an individual designer, you probably don’t have access to a press to fix a warped board. Fabrication houses are another matter, and they could conceivable de-warp a warped PCB by heating and pressing the finished board.
Here, the supposed solution is to heat up the board above the Tg value so that the resin in the PCB stackup materials can flow. Once this temperature is reached and the board is held under pressure for a period of time. This requires a large, flat metal press that can provide uniform heating to the entire PCB. After holding under pressure, the fixture and the board should be allowed to cool naturally.

The problem with this is that it essentially ages the solder mask in the same way as reflowing the board. The solder mask is a polymer and it can age just like any other polymer, eventually becoming hardened and brittle. If this solution is to be implemented it is probably best to do this before applying the solder mask, or the temperature and holding time should be limited.
If You Don’t Have the Equipment, Don’t Try to Fix It
While I’ve outlined some ways warpage can be prevented and possibly fixed, you should not try to fix warpage if you don’t have the required equipment. This is a good mantra for the individual designer who is at the mercy of their manufacturer.
If you receive a batch of bare circuit boards from a manufacturer, and the boards are all warped, you should call the manufacturer and demand a refund rather than trying to fix the warpage yourself. As I mentioned above, fixing a warped PCB requires a press with uniform heating, essentially recreating the lamination process used to build the stackup.
If you received an assembled board, and the warping is severe, then you should scrap the assembly. It’s unfortunate, but there will most likely be no way to save those boards by pressing, clamping, or bending. If you try to clamp or bend the assembled boards until they are flat, you will put a lot of stress on the solder joints in the assembly. This can cause the solder joints to fracture, and the board will now have a bunch of open connections that prevent proper operation.

If you want to make sure your fabrication or assembly provider will do the job correctly, make sure you provide qualification criteria. This can be done in your fabrication notes. Take a look at this article for guidance. You can also download my sample fabrication notes from this link.
When you need to specify manufacturing requirements and design your circuit board to prevent warpage, use the complete set of PCB design tools in Altium Designer®. When you’ve finished your design, and you want to release files to your manufacturer, the Altium 365™ platform makes it easy to collaborate and share your projects.
We have only scratched the surface of what’s possible with Altium Designer on Altium 365. Start your free trial of Altium Designer + Altium 365 today.

About Author
Related Resources
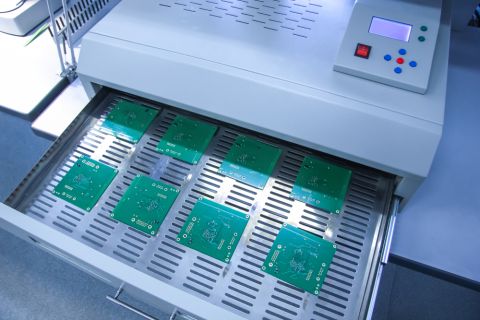


Table of Contents
Connect design data and requirements for faster design with fewer errors
Request access to Altium 365 Requirements Manager!
Accelerate your design process for faster time to market
Analyze requirement change impact for thorough resolution
Automate risk assessment and compliance
Efficiently reuse requirements, components, and connections
Create accountability and reduce intent miscommunication
Request Access
Thank you, you are now subscribed to updates.