Blind And Buried Vias—What Are They And How Are They Used?

Table of Contents
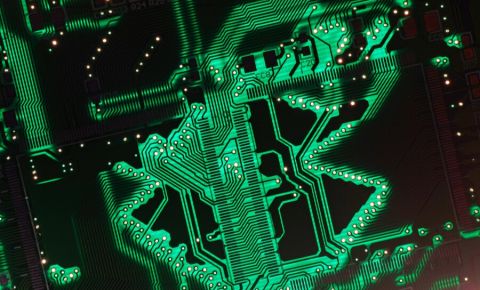
As noted in several of my previous articles as well as a large majority of other published documents, component lead pitches have become increasingly fine, and smaller form factor devices have come to dominate a large number of the products (cell phones) being developed today.
The question of how to connect components to both sides of these crowded PCBs should be among the first factors taken into account by a product development team. Typically, this connection process is done through the use of blind and buried vias. This article will describe the various types of vias used, their applications and benefits, and their shortcomings.
Some Fundamentals and History of Origin—Blind Vias
First, it’s useful to delve a bit into the origins of vias and how they are used. A via is a drilled and plated hole in a PCB that allows a signal to pass from one side of a PCB to the other or to an inner layer. Vias can be used to connect component leads to signal traces or planes or to allow a signal to change signal layers. When a via passes all the way through a PCB it is called a through hole via or through via. Figure 1 depicts the various types of vias.

Figure 1. The Various Types of Vias
Blind Vias
When a via starts on one side of a PCB but does not pass all the way through, it is called a blind via. The four types of blind vias are:
- Photo defined blind vias.
- Sequential lamination blind vias.
- Controlled depth blind vias.
- Laser drilled blind vias.
Each of these types is discussed in detail below
Photo Defined Blind Via: A photo defined via is created by laminating a sheet of photosensitive resin to a core (This core is comprised of laminated layers that may contain the power planes as well as some buried signal layers). The layer of photosensitive material is covered with a pattern that covers the areas where the holes are to be created and is then exposed to light of a wavelength that will cause the remaining material on the PCB to harden. Following this, the PCB is immersed in an etching solution that removes the material in the holes. This creates a path to the next layer down. After the etching process, copper is plated in the hole and on the outer surface to create the outer layer of the PCB. This operation is normally done on both sides of the PCB at once, and adds a layer to each side.
Photo-defined vias are commonly used to create multilayer organic BGA (ball grid array) packages and cell phone PCBs. The advantage in using them is that it costs the same to create thousands of blind vias as it does to create just one. When only a few blind vias are required, their use becomes a cost disadvantage.
Sequential Lamination Blind Via: A sequential laminate blind via is created by processing a very thin piece of laminate through all of the steps involved in creating a two-sided PCB. The laminate is drilled, plated, and etched to define the features in the side that will form layer 2 of the board. The other side is left as a solid sheet of copper, and it will form layer 1 of the finished PCB. The subassembly is then laminated with all of the other layers of the PCB. The resulting combined lamination is then processed through all of the steps involved in creating the outer layers of a multilayer PCB. Sequential lamination blind vias were used in the creation of many of the early cell phone PCBs. It is the most expensive way to form blind vias due to the extra process steps required and the yield loss associated with handling very thin laminates through the drilling, etching and plating operations. As a result, it should be considered the last resort when blind vias are required.
Controlled Depth Drilled Blind Vias: As can be seen from Figure 1, controlled-depth blind vias are created in the same way as through-hole vias. Here, the drill is set to penetrate only partway through the PCB. The designer of the artwork places a pad on layer 2 that is pierced by the drill. Care is taken to ensure there are no features below the drilled hole that may come in contact with the drilled hole. Copper is then plated in the drilled hole at the same time that copper is plated in the through-hole vias.
Controlled-depth vias are the least expensive type of blind via as no additional equipment or process steps are required to create them. The limitations of these vias are the holes must be large enough for mechanical drills to create them and the area below them must be kept clear of circuits that might be accidentally touched by the drilled hole.
Laser Drilled Blind Vias: These are created after all of the layers in a PCB have been laminated and before the outer layer has been etched and plated. A laser is used to ablate the copper on the outer layer as well as the insulating material between layers 1 and 2. There are two types of lasers used in this process:
- CO₂ laser
- Eximer laser
The CO₂ laser is the most powerful laser and therefore has the ability to quickly drill the holes. The problem with this laser is the wavelength of the light will not remove the copper on layer 1. As a result, the laser drilling step must be preceded by an etching step to etch the holes in the copper. In addition to creating another processing step, the required photo-imaging step carries with it an alignment problem as the photomask mask must be aligned with the pads on layer 2 that are invisible at the time the laser is in use.
The eximer laser is capable of drilling through both the copper and the underlying dielectric material to form the blind via in a single step. This type of laser has become the laser of choice for laser-drilled blind vias because it doesn’t require that the copper layer be predrilled and there is no extra artwork. Since the laser can penetrate both the copper and the dielectric, care must be used when setting it up to ensure that the hole will pass through the outer layer copper and the underlying dielectric without cutting through the copper pad on layer 2. Figure 2 depicts a laser-drilled hole that has removed all of the unwanted material in the hole without having drilled through the pad on layer 2.
Figure 2. Laser Drilled Blind Via
The Electrical Advantages of Blind Vias
Vias in signal lines are plagued with the parasitic capacitance that is created by the barrel of the plated through-hole and the planes through which it passes. This parasitic capacitance is primarily a function of the area of the outside of the plated through-hole which is a cylinder passing through the PCB. This area is determined by the diameter of the drill and the PCB thickness. With today’s high data rates, this parasitic capacitance can degrade the signal beyond where it can be successfully used. Therefore, there has to be some method for reducing this parasitic capacitance. Blind vias do this by shortening the length of the vias and reducing their diameters. As a result, blind vias are a good way to connect signal lines that operate above 4.8 Gb/s.
The Shortcomings of Blind Vias
The are several shortcomings in using blind vias (photo-defined, controlled depth, and laser) that are drilled after the PCB has been laminated. The first limitation is the depth of the hole vs. the diameter. A blind via is a blind hole in the surface of the PCB. Getting the plating chemistry into this hole such that the copper is deposited into the bottom and sides of the hole can be difficult if the depth of the hole is deep compared to its diameter. In order to ensure that the plating is done successfully, the diameter of the hole must be as large as its depth. This is defined as an aspect ratio of 1:1 or less. Many fabricators need a diameter that is 1.5 times the depth of the hole in order to guarantee proper plating. In most instances, this precludes drilling a blind via below layer 2 of the PCB. The development engineer must be able to connect all of the pins of a fine pitch device such as that shown in Figure 3 in either layer 1 or
2.
Figure 3. A 0.5mm Pitch Component Using Blind Vias
It was not possible to do this with the part shown in this figure so many of the pins were fanned out from under the part to allow drilled, through hole connections to layers deeper within the PCB.
A second limitation to using blind vias is having the capability to stop the drilling at the intended layer. When a laser drill is used, it must drill through the copper on the layer 1 and the underlying dielectric material without drilling through the copper-connecting pad that is in layer 2. This means the laser beam must be carefully calibrated. When controlled depth drilling is used, the drill must stop before it touches the copper in the layers that are below the layer to which the connection is being made.
A third problem associated with blind vias is related to soldering a component to a pad into which a blind via has been placed. A potential reliability problem can be caused by the holes. (Reference 47 in Volume 1 of our book describes this problem). When solder paste is applied to the pads, the air in the blind via is trapped under the hole, just under the BGA. This tiny bubble of air weakens the joint enough that open circuits will occur as the PCB cycles through the various operating temperatures. There are two ways to solve this problem:
-
Fill the hole completely with plated copper as shown in Figure 4.
-
Drill the blind via off to the side of the pad.
Figure 4. Stacked Blind Via with Surface Via Filled with Copper
In Figure 4, three blind vias have been stacked one atop the other. The lower via was formed along with all of the other vias in the PCB. The upper two vias were formed using the build-up process discussed below. Each via was formed as shown in Figure 1. After plating the blind via and all other vias, the panel was sent back through the plating resist operation where a new layer of resist was exposed to a pattern where only the blind vias were exposed. Then, copper was plated in the blind vias until it completely filled the voids. This operation is often referred to as button plating. In order to ensure that every blind via is filled with copper, the plating operation runs until copper sticks above the surface. After the plating process is complete, the plating resist is removed and the entire surface of the PCB is sanded to smooth out the copper. All of these extra steps in the plating process add cost to the finished PCB. Figure 4 shows the blind via operation done three times, one atop the other.
An alternate approach to the bubble problem is to drill the blind via off to the side of the component (this is also described in Reference 47 of our Volume 1 book). This approach does not require any extra process steps. It does require that the product developer allows for room to be added for the blind via at the side of the pad. Figure 5 provides an example of vias that have been drilled to the side of center.
Figure 5. Offset Laser Drilled Blind Vias
This alleviates the bubble problem because the aforementioned bubble forms at the side of the solder ball rather than at its center. Note: If there is an air bubble that is not directly under the solder ball, it won’t cause any problems.
When there is a need to build vias in two layers, one above the other as shown in Figure 4, and you don’t want to take the extra steps in plating the vias full of copper, there is an alternate approach. In this instance, you place the second via to the side of the first one so that it does not land on top of the hollow formed by the first via.
Blind Vias Gone Bad
As cited above, there are several ways in which blind vias can “go bad.” In the above, the problems can be the result of selecting the wrong type of via for the product under design, incorrectly incorporating the via into the overall board design, or the via not being manufactured in the correct way. Another way that vias can go bad is linked to the glass cloth that is used in laminates. Figures 6-8 are examples of these types of bad vias. All of them were bad due to the non-uniformity of weave style of the glass cloths within the laminates—aka the lack of mechanically spread glass. I discussed the topic of mechanical spread glass in a previous blog.
Figure 6. Bad Blind Via Example 1
Figure 7. Bad Blind Via Example 2
Figure 8. Bad Blind Via Example 3
Buried Vias
When a via passes between two inner layers of a PCB, but does not touch either surface, it is a buried via. A common error is to call a blind via a microvia. According to the IPC, a microvia is a via whose diameter is 8 mils or less, whether or not it goes all the way through the PCB. A buried via may pass between any two layers as shown in Figure 1 or it may pass through several layers as shown in Figure 9.
Figure 9. Buried Via
In either instance, the buried via is formed by processing the set of inner layers involved through the process illustrated in Figure 10. These are all of the steps involved in creating a finished PCB with additional layers added to the outside using the build-up process. This is obviously a more expensive process than straight forward multilayer processing. Many of the BGA substrates used in high pin count devices are made this way, as are cell phones.
You can read more about using blind and buried vias in Altium Designer here. Have more questions? Call an expert at Altium or upskill yourself by reading more concerning the best toolset for PCB via creation in PCB design with Altium Designer®.
About Author
Related Resources


Related Technical Documentation


Take advantage of the world's
most trusted PCB design system.
One interface. One data
model. Endless possibilities.
Effortlessly collaborate with
mechanical designers.
The world's most trusted
PCB design platform
Best in class interactive
routing
View License Options
Thank you, you are now subscribed to updates.