


Getting Started with MicroPython and the Raspberry Pi Pico

At a Glance
In this article Ari Mahpour introduces the MicroPython programming language and how it can be used on the Raspberry Pi Pico, specifically for hardware engineers.


If you speak to almost any hardware or embedded engineer who dabbles in code, you’re most likely to discover that they have some (if not lots) of experience with the Python programming language. This scripting language became extremely popular over the years due to its user-friendliness, being quick to learn, and immediate runtime through an “interpreter.” Over time, embedded engineers looked for that same, fast language without all the compiling baggage and strict language requirements. In comes MicroPython, which is a programming language targeted for embedded devices such as the Arduino Nano 33 BLE, ESP8266 (e.g. NodeMCU), and the Raspberry Pi Pico. In this article we will be looking at an overview of MicroPython and how to work with it on a Raspberry Pi Pico.
What is MicroPython and why use it?
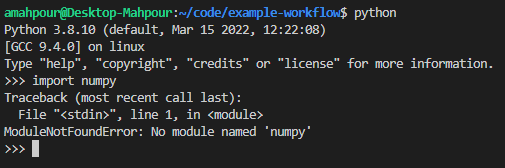
For those who are familiar with the Python language there is a very obvious benefit of using it over a compiled language such as Java or C++. Python functions as an “interpretive” language, which means the code is interpreted and executed on the fly versus compiled code. While compile code may run faster, interpreted code allows users to rapidly iterate and test out code very quickly since the compile stage has been removed. Python is also not nearly as finicky of a language compared to C++. With Python, types are a thing of the past, so variables are much easier to handle (albeit this can get you into trouble sometimes). Since Python has an interpreter it can also be used to test out code on the fly without any compilation necessary. For example, if we want to validate that the “numpy” Python package has been installed, I can open up a Python shell and run an import command:
Figure 1: Demonstration of import in a Python shell
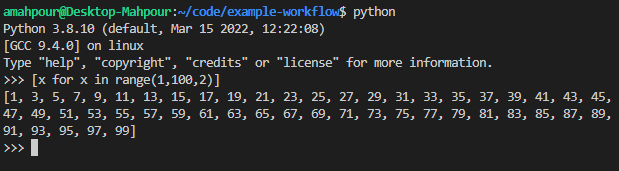
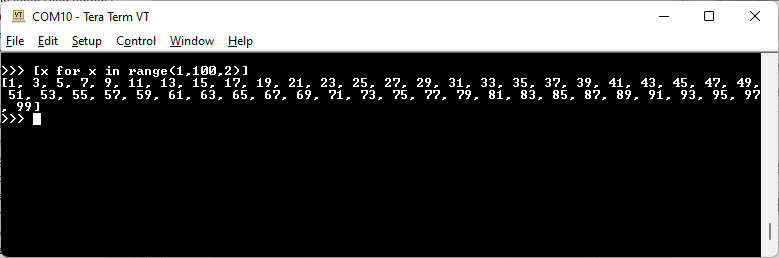
As you can see above, it looks like I do not have that module installed. Another example could be testing out a piece of code that we’re not familiar with but would like to see the results of immediately without creating a whole file associated with it. For example, let’s say I’ve just learned about list comprehension in Python, and I want a quick way to test out what I have learned. I can open up a Python shell and fire away:
Figure 2: Demonstration of list comprehension in a Python shell
With Micropython we can do the same exact thing but we get to do it directly on our hardware targets. Before we dive into the details, let’s walk through how to get started with one of the cheapest and simplest MicroPython enabled hardware devices out there: the Raspberry Pi Pico.
Getting started with the Raspberry Pi Pico
For the price you really can’t beat the Raspberry Pi Pico. It’s got a dual ARM Cortex-M0+ and costs only $4 from Adafruit.com (at the time of writing this article). Getting started with the Pico is relatively easy once you get through the setup process. Your Pico device will arrive without MicroPython loaded onto it. To get MicroPython on your board you’ll first need to download the bootloader here. Plug in the Pico device into your computer, and look for a new drive (just like you would with a USB thumb drive). My device shows up as a drive called “RPI-RP2.” Go ahead and copy the downloaded UF2 file to the device and you’ll notice that the device will now show up as a COM Port (after a second or two).
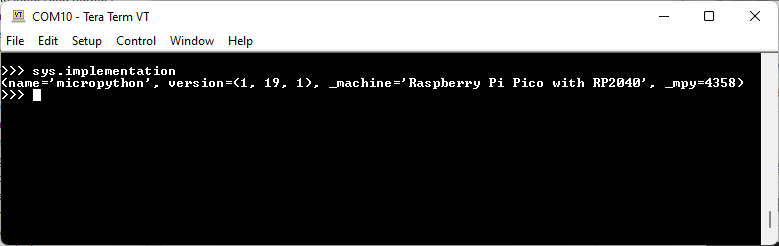
You’ll now need a way to talk to your Pico device over serial communication. A lot of folks use Putty but I like to use TeraTerm when I work on Windows. Download either software, and connect to the new serial port that shows up. Hit enter, and your Python shell should show up. In this screenshot, you can see that I am retrieving the system information on my target device:
Figure 3: System information retrieved from the Raspberry Pi Pico
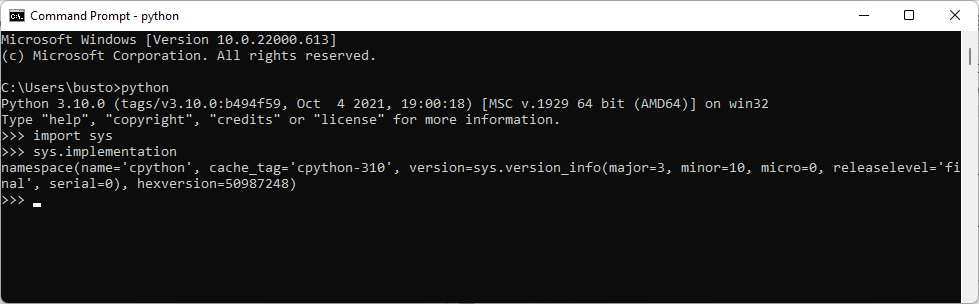
If I run the same command on my windows machine you’ll see something different:
Figure 4: System information retrieved from a Windows machine
Just like my interpreter example above I can run the same list comprehension command on a Pico device just like I did on my PC:
Figure 5: List comprehension example on a Raspberry Pi Pico
Blinky LED
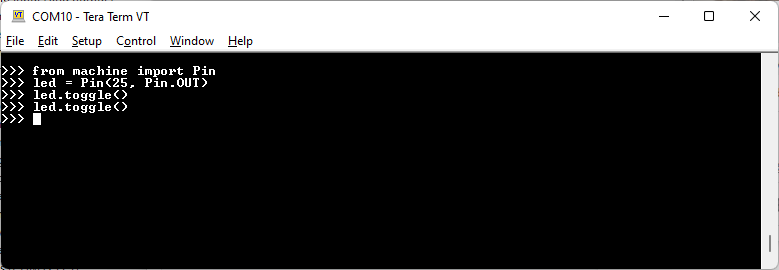
Every Getting Started guide must, of course, contain the standard “Blinky LED” example. The official guide from the Raspberry Pi foundation is no different. In this article I have adapted it slightly but a lot of the basics can be found there as well. First, let’s test out our code in the interpreter shell before we commit to writing it all up in a file:
Figure 6: Toggling the Pico LED through the interpreter shell
As you can see in the image below the LED has now been turned on using the toggle command:
Figure 7: Pico LED lit up after toggle command issued
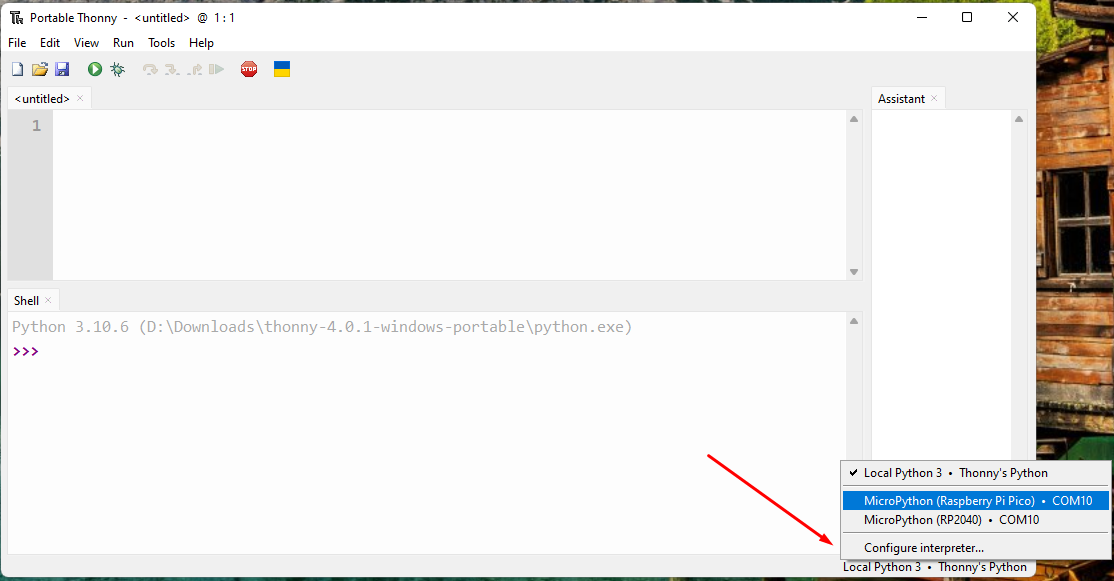
Now that we’ve got the interpreter shell working smoothly we can move to the file execution method. The officially supported IDE with all the necessary tools is called Thonny. You can download the IDE from their website. Once installed and opened you’ll need to select the the Pico as your target device by clicking on the bottom right corner text:
Figure 8: Target device selection in Thonny
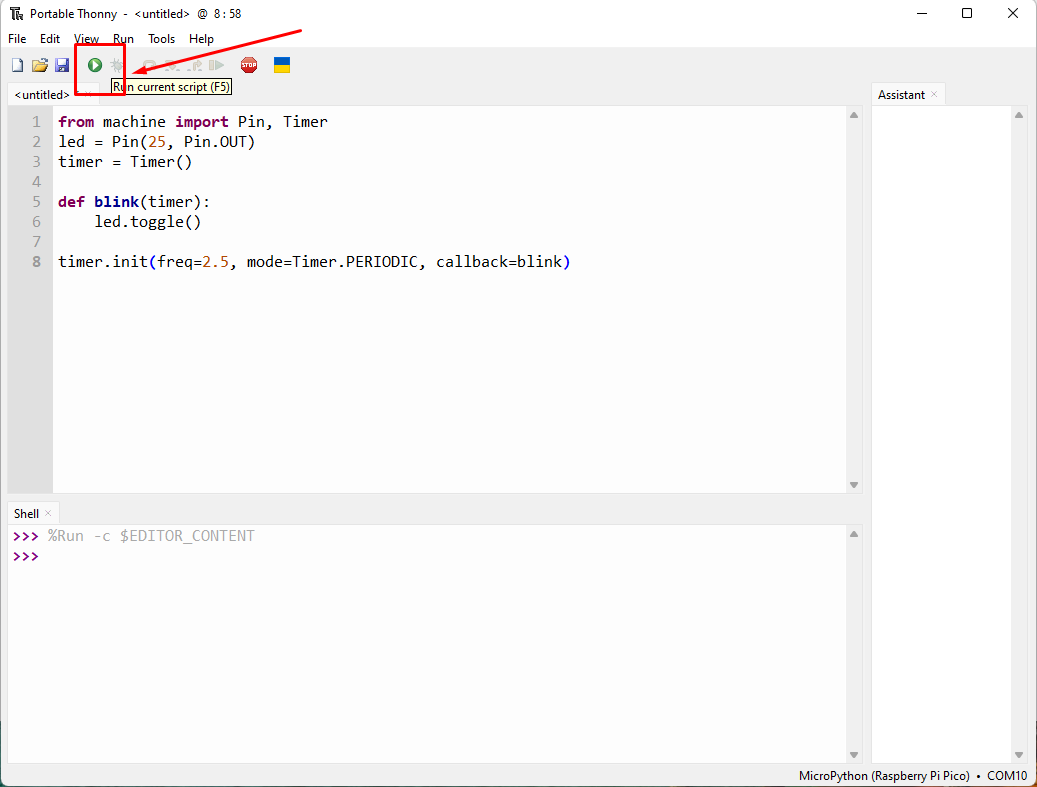
Once configured, you can use the Python shell at the bottom window to test your code (like we did above) or write MicroPython code in the editor above. If performing the latter, just click on the run button and your device will be loaded with the code via Thonny.
Figure 9: Run scripts on the Pico via Thonny
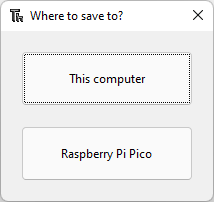
Finally, we can save the file directly on the Pico by navigating to File > Save as in Thonny, and then clicking on the “Raspberry Pi Pico” button:
Figure 10: Thonny file save dialog
Saving to the Pico with a filename of “main.py” will automatically load your script every time you power the device.
Multicore capabilities
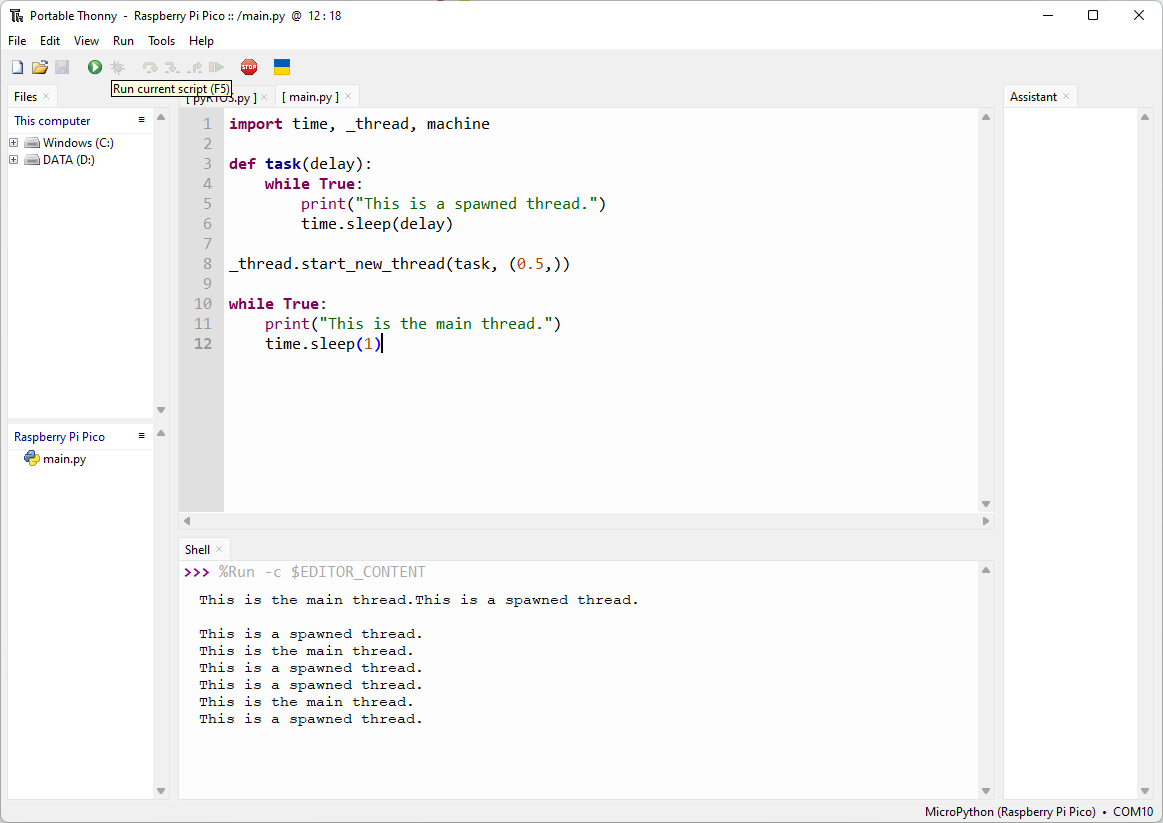
Armed with the basics, you should now be able to write MicroPython code just like you would any normal Python script, and deploy it onto your Pico. One exciting aspect of this ridiculously cheap device is the dual-core nature of the microprocessor. By having a dual core, we can now spin threads to run completely separate from each other in parallel (versus time slicing). The Raspberry Pi Pico Python SDK handbook provides many terrific code examples to get started. One of particular interest is the multicore example, which enables us to control hardware with one core (i.e. SPI communication that performs continuous polling) without interrupting the main loop (which may respond to commands, provide telemetry, etc.). Here is an example adapted from the SDK of what a multi-threaded program could look like:
Figure 11: Thonny running a multi-threaded script
As you can see, we can easily prototype threading across multiple cores with very little overhead. This is another reason why MicroPython brings so much to the table as an emerging embedded programming language.
Conclusion
In this article we learned how to get started with MicroPython, specifically on the Raspberry Pi Pico. We reviewed the concept of an interpreted language versus compiled, and other reasons why a language like MicroPython would be beneficial for use with a microcontroller. We reviewed very basic examples such as blinking LEDs, and also more sophisticated examples that took advantage of multiple cores. With the information and resources provided, you should be able to start working on some MicroPython examples using a Raspberry Pi Pico.
About Author
Related Resources
Related Technical Documentation
Table of Contents
Design to Release, Without the Friction
- Keep reviews tied to the right version
- Reduce handoff confusion and rework
- Spot sourcing and release risk earlier
- Work solo, share when needed
Get Started
Thank you, you are now subscribed to updates.