


Getting Started with Jetson Orin Nano Development Kit

At a Glance
Set up the Jetson Orin Nano kit and run local LLMs and vision AI demos. Learn to flash the OS, deploy Ollama, and test NanoOWL. All on this tiny AI powerhouse.


One of the most popular AI at-the-edge platforms out there, the Jetson Orin Nano development kit provides a lot in such a small package. It has one of the highest performance-to-cost ratios among development kits and, as a result, has been sold out for months. If you can get your hands on one of these (which took me months to do) you’re in for a real treat. In this tutorial, we’re going to show you how to get started with the development kit. Specifically, we’ll walk through how to:
- Flash the operating system
- Run a local LLM using Ollama and Open WebUI
- Use vision-based machine learning with NanoOWL and Jetson Containers
Configuring the Board
The Jetson Orin Nano is in high demand. At the time of writing, it was backordered through vendors like SparkFun and DigiKey. If you're considering buying one, go get it now. Once you have it in hand you’ll need to get a base operating system on it. Head over to the Jetpack SDK page to download the latest image to flash on your MicroSD card. Similar to previous embedded tutorials, you’ll need Balena Etcher to flash the image. Flash the MicroSD card, then insert it into the Jetson device:
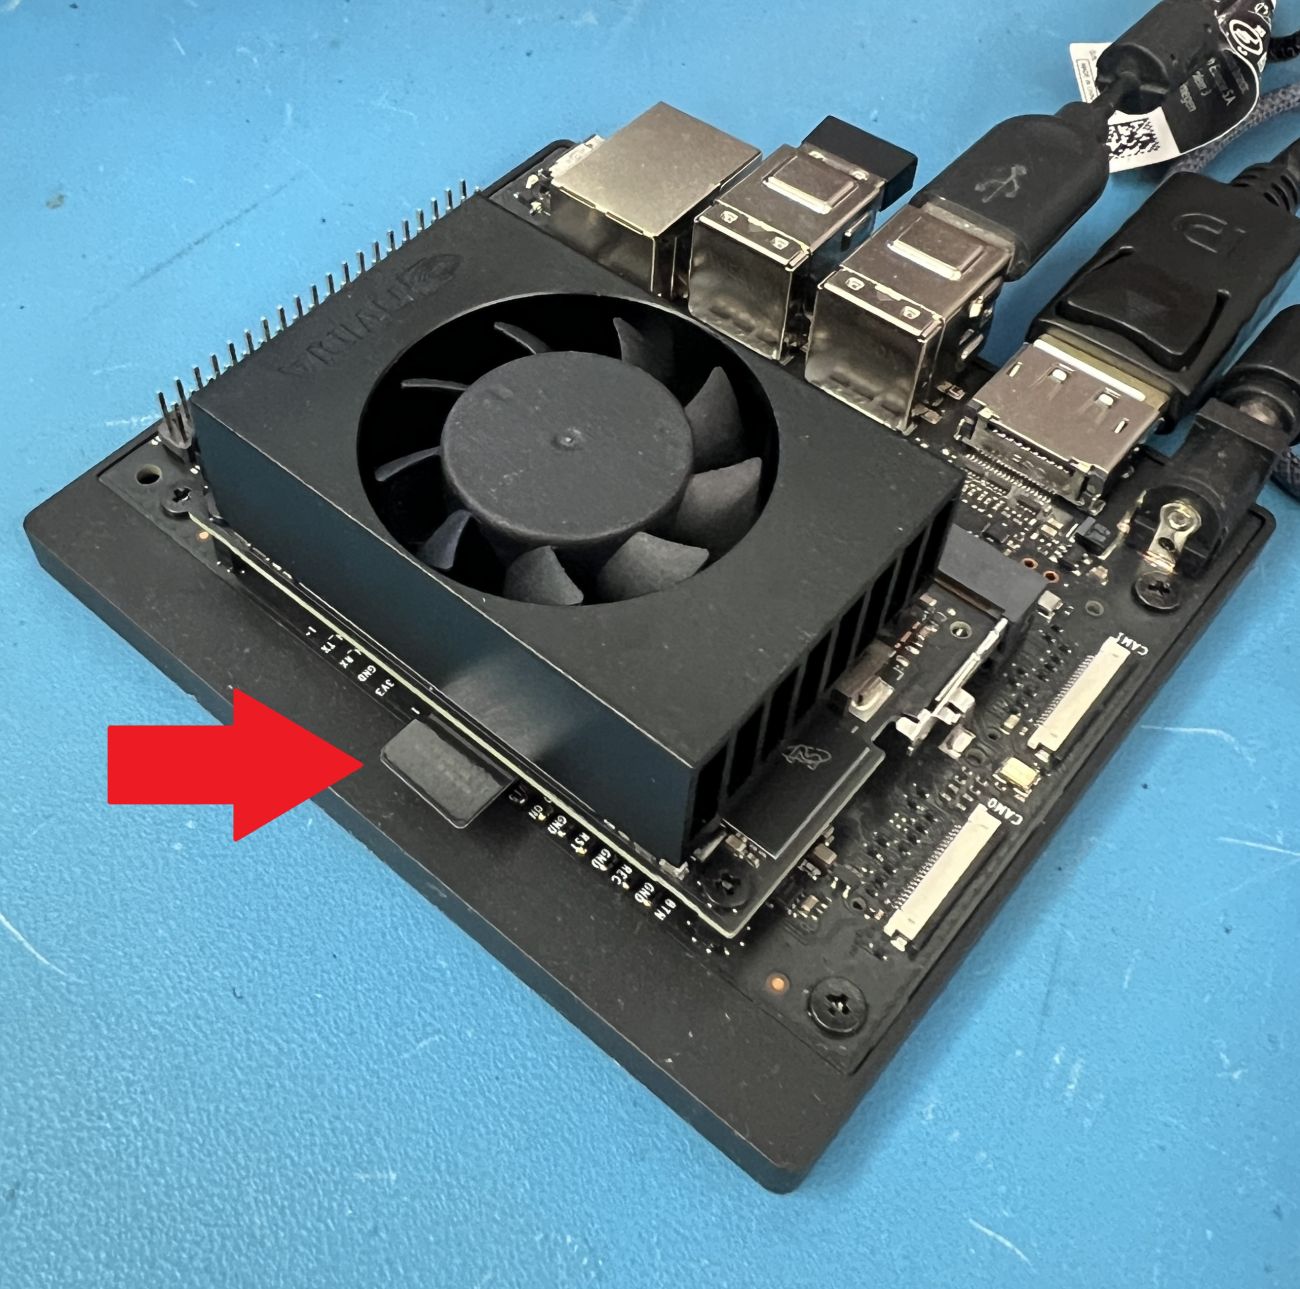
After that, plug in your Jetson kit to a monitor, keyboard, mouse, and then to a power source. Give it a couple of minutes to come up as it can take a little extra time on initial boot-up. You’ll also be greeted with a couple of configuration pages (such as user name, password, internet connection, etc.). While I’m a huge fan of using NVMe only, at the time of writing, getting started with the Jetson Orin Nano kit on NVMe only required Linux and a full SDK install. To me, this wasn’t worth the hassle (especially since I was on a Windows machine) so I stuck with the MicroSD card. It’s definitely something to consider as running on a MicroSD card will take a pretty heavy performance hit.
Setting Up the Board
Before running any examples it’s important to make sure we’ve got everything up to date. Open up the Terminal application and run:
sudo apt update -y && sudo apt upgrade -y
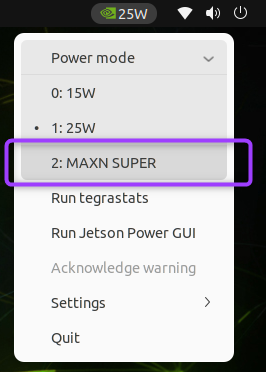
We will also want to kick this board into high gear by selecting the MAX power option.
After this point, you’re ready to start trying out some neat examples.
Running a Local Large Language Model (LLM) with Ollama
One of the advantages of using the Jetson Orin Nano is that, for such a tiny device, it’s got a pretty powerful GPU onboard (compared to other embedded devices). We can leverage that by running LLMs locally. The caveat here, of course, is that it pales in comparison to flagship LLMs that you pay for in the cloud. It’s also not going to stand up to your high-end gaming graphics card. For small models, however, it’s still pretty neat as it provides a fully functional LLM at the edge with no internet connectivity whatsoever.
For hosting LLMs, we’re going to use Ollama. Ollama is probably the most common and easiest platform to get started with running LLMs. It’s not the most efficient but for demonstration purposes it’s incredibly easy to get started and works right out of the box. To get started, open up the Terminal app and run:
curl -fsSL https://ollama.com/install.sh | sh
Once Ollama installs you can run a model directly in the terminal like so:
ollama run llama3.2:3b
Type away and start to play around with it. This is, obviously, a very limited way of interacting with an LLM so we’ll set up a full web application that gives us much more flexibility in how to interact with the LLMs. In a new terminal run the following command:
docker run --network=host -e OLLAMA_BASE_URL=http://127.0.0.1:11434 --name open-webui ghcr.io/open-webui/open-webui:main
If you’ve seen the official Ollama tutorial from NVIDIA’s website, you’ll notice the command above is different from what they provided. I was unable to get my Docker container to communicate with the Ollama server using their Docker command but the above one worked for me. Feel free to experiment if you wish. At this point, you should be able to drop into a web browser (on the Jetson device) and navigate to http://localhost:8080/. If you’re accessing the web UI from another device you’ll need to change localhost to the IP address of your Jetson device. You’ll be greeted with a sign-up page after clicking on the arrow above the “Get started” text:

This step is a bit misleading. No account is actually needed, and it’s not being sent to any server anywhere. Just enter anything into the fields to move to the next page. Now you should be at a familiar page that looks similar to a standard LLM-hosted page (e.g. ChatGPT, Claude, Grok, etc.):
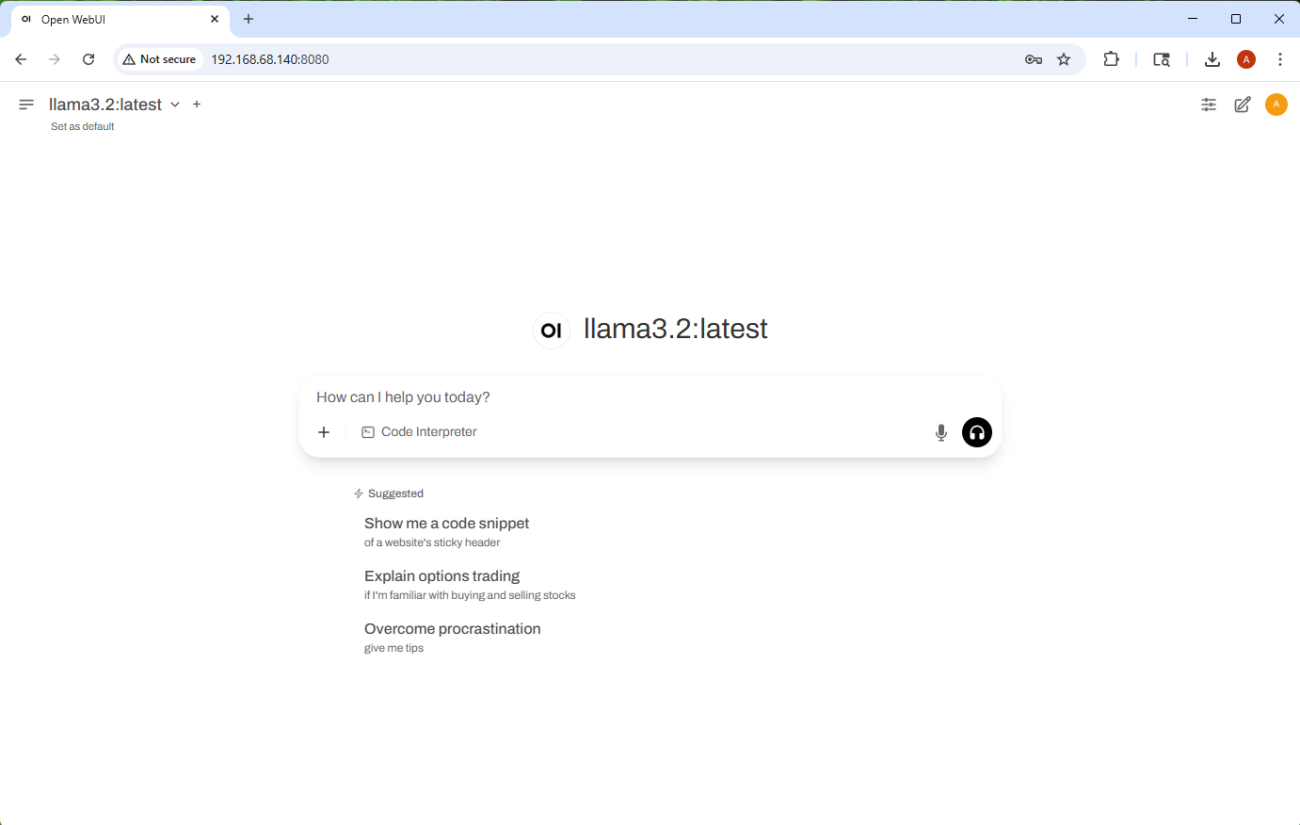
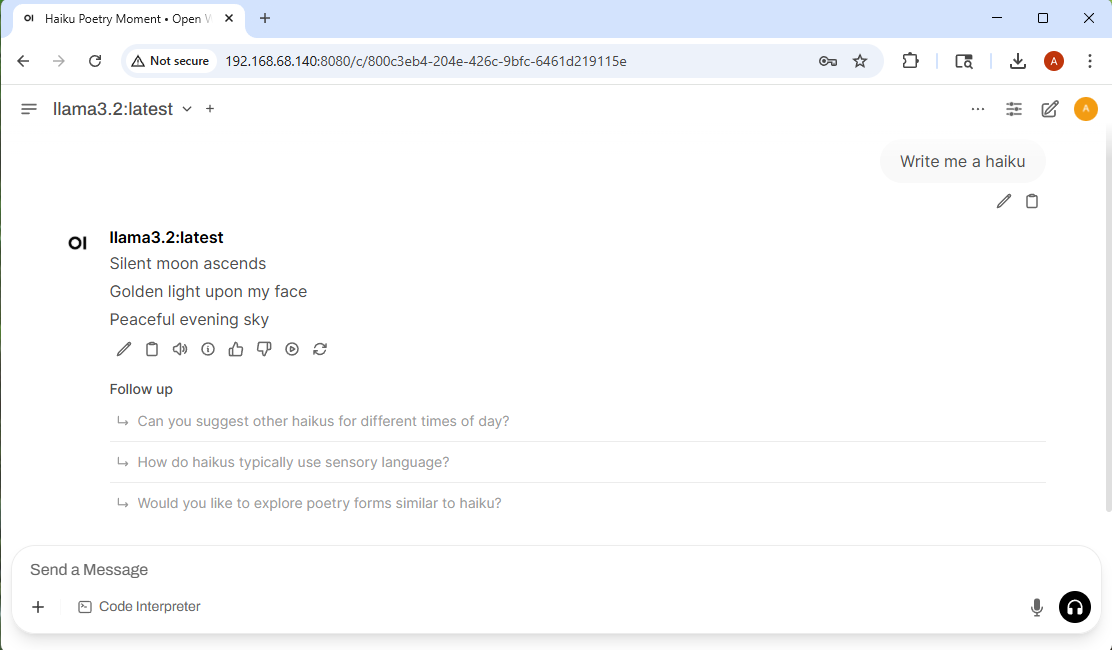
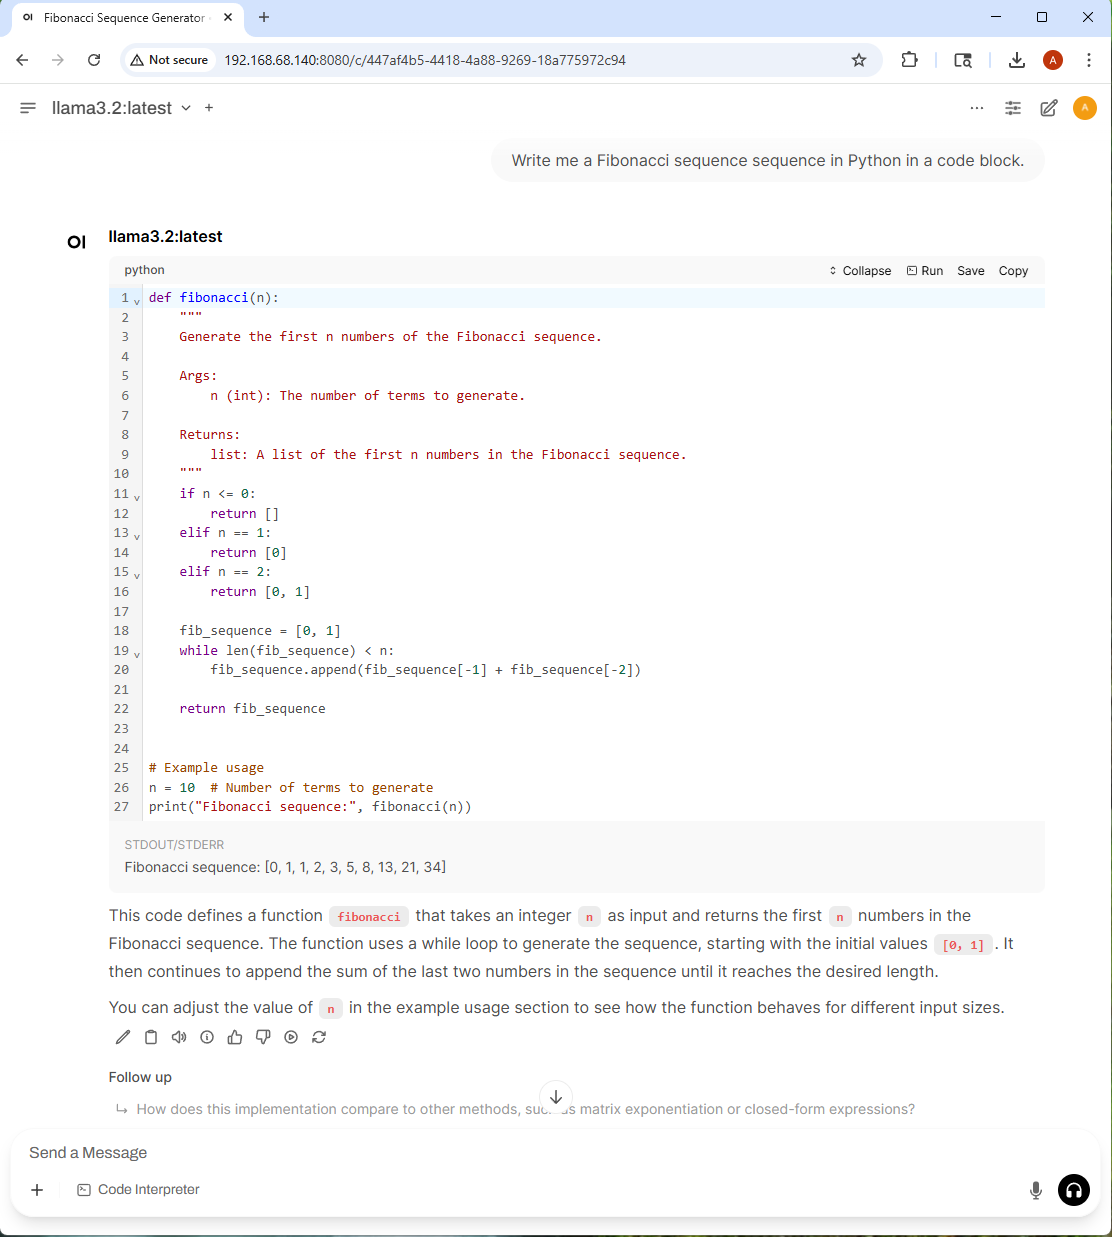
Once the web page loads, you can select an LLM and start asking it questions or giving it tasks. Keep in mind that we’re using very lightweight models (e.g. llama3.2:3b) so you really can’t expect much from it. You can ask it to write a haiku:
You can also ask it to write simple code. The cool part about this is that it can actually run the code:
Now you can experiment with other LLMs by running the ollama pull <model_name> command from the terminal. If you’re feeling really ambitious you can train your own models to do specific tasks and that can prove to be quite rewarding on a small device such as the Jetson Orin Nano kit.
Running the NanoOWL Vision Demo Using Jetson Containers
Computer vision is one of the most popular ways to utilize onboard GPUs for embedded devices. Using GPUs to recognize objects through a live camera feed has been one of the most common examples used for years prior to the LLM frenzy. Lucky for us, computer vision demos have become much easier to develop and run on devices like the Jetson Orin Nano. In this article, we’re going to run an example developed by the NVIDIA team called NanoOWL using Docker containers (which means there’s little setup that needs to happen locally).
Before starting the example, you’ll need to plug in a webcam into the USB port. You’ll need to install an overlay that sits on top of Docker called “Jetson Containers.” To set this up, run the following commands in the Terminal app:
git clone https://github.com/dusty-nv/jetson-containers.git
cd jetson-containers
bash jetson-containers
After completing the setup, run the following command in the Terminal once again:
jetson-containers run --workdir /opt/nanoowl $(autotag nanoowl)
Once the Docker container starts, run the following command to ensure your container has access to the webcam:
ls /dev/video*
You should see the device listed as video0, video1, etc.
You will need to install the following module as well:
pip install aiohttp
And now we’re ready to run the demo:
cd examples/tree_demo
python3 tree_demo.py --camera 0 --resolution 640x480 \
    ../../data/owl_image_encoder_patch32.engine
Just like the LLM example above, we will need to navigate to the webpage of the hosted service: http://<ip address>:7860. If you’re running the example locally on your Jetson device, you can navigate to http://localhost:7860, otherwise you will need to use the IP address assigned to the device. The web application is pretty bare bones. You’ll be greeted with a video feed from your webcam that’s attached to the Jetson Orin Nano device:
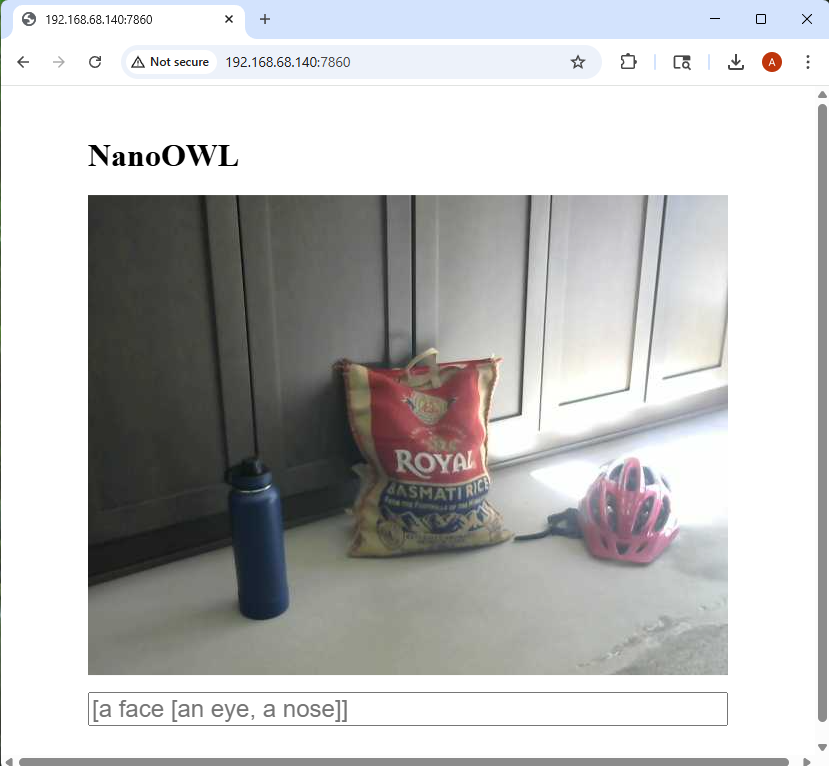
Now you can start placing objects in the view of the webcam and try to identify them using computer vision:
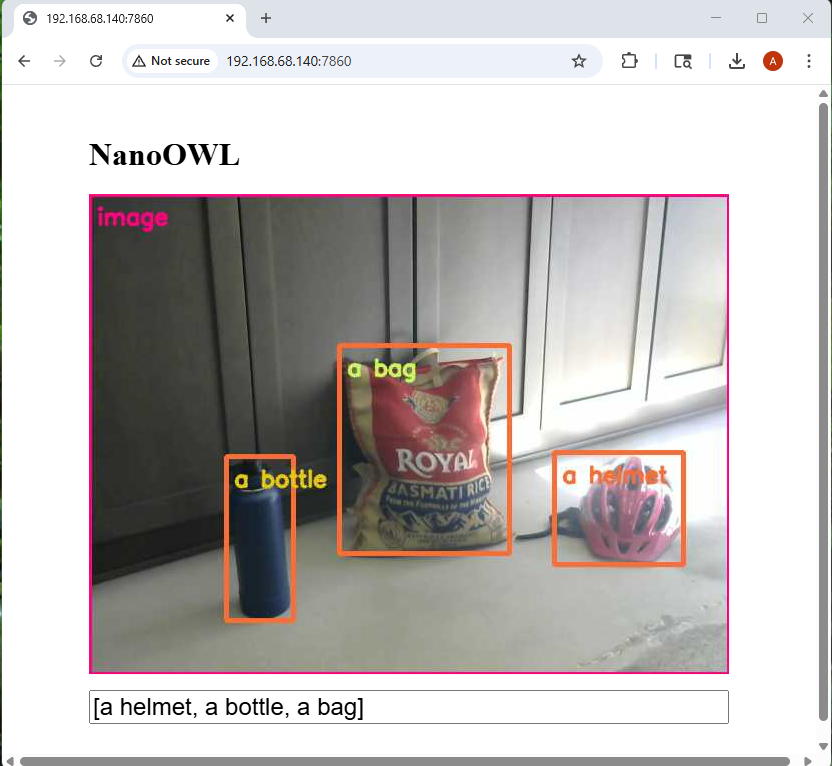
Notice how it classifies each object separately. You can also do nested classification such as a bottle in a box. For more information on how NanoOWL works see the official tutorial from NVIDIA.
Conclusion
While the Jetson Orin Nano development kit might be small, it packs quite a powerful punch. In the examples above we’ve demonstrated that it not only runs a full operating system at peak performance (similar to Raspberry and Orange Pi) but the onboard GPU lets us run high-quality AI based applications such as LLM model servers (Ollama) and machine vision processing (NanoOWL). Whether you’re an expert looking to embed GPUs into your devices or a hobbyist exploring edge computing, the NVIDIA Jetson Orin Nano is a fantastic way to dive into the world of Edge AI.
About Author
Related Resources
Related Technical Documentation
Table of Contents
Design to Release, Without the Friction
- Keep reviews tied to the right version
- Reduce handoff confusion and rework
- Spot sourcing and release risk earlier
- Work solo, share when needed
Get Started
Thank you, you are now subscribed to updates.