


Building an MCP Server for the Analog Discovery 2

At a Glance
Turn the Analog Discovery 2 into an AI-controlled bench tool. Learn to build an MCP server on WaveForms with FastMCP and avoid common LLM driver pitfalls.


Building Model Context Protocol (MCP) servers to control various instruments can be tricky. With MCP turned on, the LLM in your IDE can call functions directly from your driver instead of just suggesting code and hoping you run it. Not all instruments behave the same, respond to the same command scheme, or contain the same setup.
Luckily, there are industry standards for test equipment such as Standard Commands for Programmable Instruments (SCPI). If we ever get stuck, we can just consult the SCPI manual, issue a basic VISA command, and we’re on our way. More complex test equipment, however, doesn’t always comply or conform to a standard.
In this article, we’re going to look at how to build an MCP server for the Analog Discovery device, a device that packs a full oscilloscope, logic analyzer, and waveform generator in a tiny, little package. Using it via Python scripts is not as simple as controlling a standard instrument, so we’ll go through the implementation and some of the gotchas that you need to keep in mind.
Setting Up
To get started, you’ll need an Analog Discovery device. At the time of writing, the Analog Discovery 3 was out (though I am using an Analog Discovery 2).
Following the instructions on the device page, you’ll need to install Adept runtime and Waveforms as well.
As usual, I’m using Linux for this setup which means, if you’re following along, you’ll need to download all the Linux binaries. If you’re using Windows Subsystem for Linux (WSL), you can utilize usbipd in order to forward the device from Windows to the WSL instance. For more detailed instructions on how to do this with usbipd, take a look at the video tutorial for this project.
Lastly, all the code that I wrote to build the MCP server lives in the following repository: MCP Server for Analog Discovery devices. It also contains instructions on how to get set up on MacOS as well. The README is also pretty comprehensive so if you’re itching to dive right in you can consult the documentation there.
Exploring the Project
Just as we’ve done in Building a Model Context Protocol Server for Arduinos and Building an MCP Server for Your Lab Equipment, we leverage the FastMCP Python package to make our code not only look nice but achieve quite a bit in just a few lines or less. The concept, as discussed in the previous article, allows us to add a single decorator to our functions in order to turn them into MCP tools.
As you will see in server.py, “@mcp.tool()” above the function declarations, towards the bottom of the file, indicate that these are the tools that will be available on the server. All other functions are just helper functions that are not exposed to the large language model (LLM). The library is, by no means, exhaustive, as it merely demonstrates the capability of wrapping the Analog Discovery controller in an MCP tool. The functions, however, are good enough to showcase some capabilities.
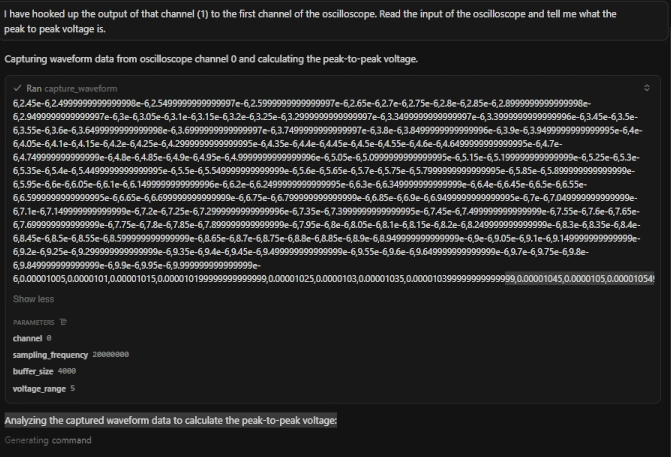
The “capture_waveform” tool, for example, does just what it sounds like: captures waveforms. In practice, this is the fun part: you can just request from the LLM to “read the oscilloscope input,” and the LLM usually picks the right tool (capture_waveform) without you calling out the function name. Notice how in this instruction I tell the LLM that I want it to “read the input of the oscilloscope” and it automatically knows which tool to call.
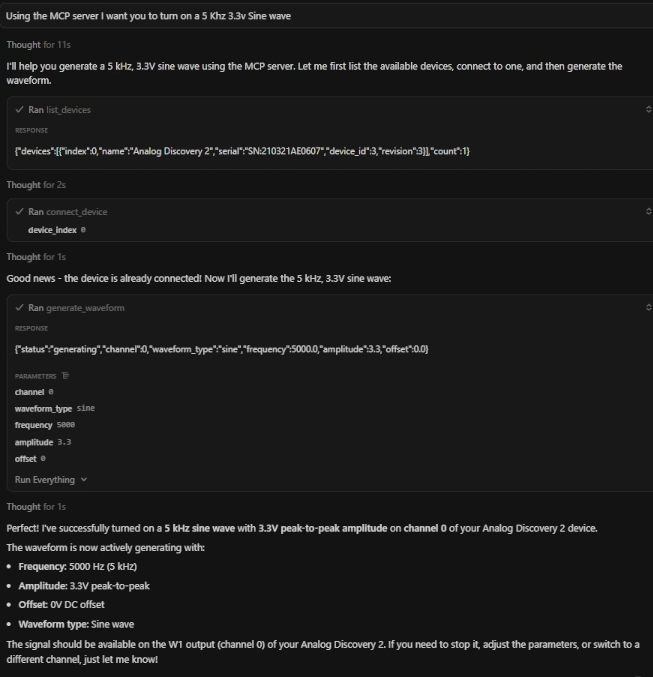
Just like reading in signals, the LLM can also issue commands like driving a waveform as well:
Sources of Truth and Testing
When writing your library (or having your friendly LLM do it for you), it’s very important to identify the “sources of truth.” What I mean by “sources of truth” is making sure you go back to the true source of where the code should stem from. An LLM, left to its own devices, may attempt to take a lazy shortcut and install a third party pip package and claim this project as done. That’s not going to fly and will bite you later. I ensured to point my LLM directly to the official Waveforms SDK. This is important because it was the original manufacturer, Digilent, who wrote this SDK and contained the most direct and efficient way to access the hardware - just the way they intended it to be.
It’s also important to verify the tools, either with automated script or manually, when pairing with an LLM. For example, if not specified carefully (or the incorrect language is used) you may end up with double the amplitude when asking for a peak to peak voltage. In my case, asking for a “3.3 V sine wave” turned into 6.6 Vpp because the tool interpreted the value as “peak” instead of “peak-to-peak.” It may not always handle the relationship between peak-to-peak voltage and amplitude - especially if your MCP server expects one and your prompt describes another (i.e. not interchangeable). This can either be reconciled in your prompt or the docstring of the functions itself.
Another thing to note, as mentioned in previous MCP tutorials, is to ensure limiting the amount of data that returns in an MCP tool call. For example, if you’re capturing a waveform that may contain thousands of datapoints, returning that as a JSON object will require an immense amount of tokens to process - which can be super expensive and slow down the entire process. It would be advantageous, in that scenario, to dump the waveform data to a file and then let the LLM decide how best to deal with the data (e.g. plot it for you, dump it into a Pandas dataframe, etc.).
Conclusion
In this article, we reviewed the MCP tool server built around the Analog Discovery device and demonstrated some capabilities around how those tool calls are made with an LLM. Compared to a standard lab instrument (which uses SCPI), we needed to pay special attention to the Waveforms SDK programming guide that they provided us in order to build the most precise and efficient MCP tool possible.
Additionally, as always, we reviewed some gotchas around return data and verification.
Now armed with an MCP controlled Arduino, lab instrument, and Analog Discovery 2, the sky is the limit for what we can build. What will you build next?
About Author
Related Resources
Related Technical Documentation
Table of Contents
Design to Release, Without the Friction
- Keep reviews tied to the right version
- Reduce handoff confusion and rework
- Spot sourcing and release risk earlier
- Work solo, share when needed
Get Started
Thank you, you are now subscribed to updates.

