


Creating Components in Altium 365 at Warp Speed

At a Glance
In this article, Ari Mahpour shows you how to add components to your Altium 365 library leveraging the Component Search Engine from Samacsys or SnapEDA. Read on to discover the effectiveness of these free resources on the Cloud.


In the last article, How do I Get Started with my Altium 365 Component Library?, we walked through the basics of component creation with the Manufacturer Part Search (MPS) panel in the Altium 365 Workspace. Connections to Octopart and IHS Markit populate the component information of the MPS panel. However, manufacturers and suppliers generally provide the component models directly through their connections to the Octopart database creating limitations with creating certain components. This article will look at alternative ways to add model-less components into your Component Library without creating them from scratch.
Component Creation without Existing Models
If you can't find the exact schematic symbol and footprint for your component in the Manufacturer Part Search panel, don't worry. There are other options available to you before you resort to creating them manually. In fact, I wrote an article a while back detailing some great free footprint libraries that you can use. If you can't find your part in the Manufacturer Part Search panel, there's a good chance that one of these resources will have it. A great place to start is the Component Search Engine from Samacsys or SnapEDA. To demonstrate how this works, let's walk through an example. Of course, it's important to note that you'll need to have the necessary requirements in place, such as plugins and libraries, to access these resources.
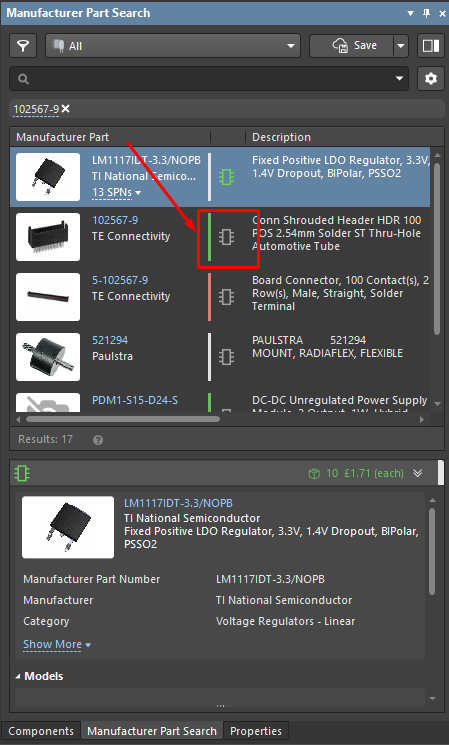
Let's say you're currently using Altium Designer and need to add a 102567-9 connector from TE Connectivity. A quick search in the Manufacturer Part Search panel pulls the parameters of the part from Octopart, but the models are missing from TE Connectivity. No sweat, let’s go look at some other resources before resorting to creating the part manually.
Figure 1: Manufacturer Part Search for 102567-9 from TE Connectivity
Finding Component Models Online
I’ll first start with SnapEDA, a plugin for Altium. I searched for “102567-9,” and it came back with one component. I see that both the footprint and schematic symbol is available for download. The 3D STEP is also available, but it’s not so important because we can download it directly from the manufacturer. SnapEDA has created an integration tool for PCB design software, including Altium Designer and most ECAD tools. Still, I’m a bit old school, so I’ll download the Zip package and add it manually to my Component Library. Clicking on the “Download Symbol and Footprint” button will open another pop-up window asking which ECAD tool you use. Since we’re using Altium Designer, I click on the “Altium” button, and the ZIP file gets downloaded to my computer:
Figure 2: Downloading a component from SnapEDA
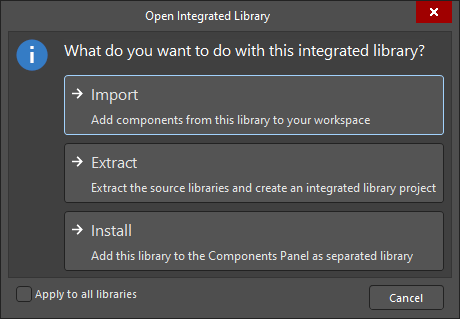
Unzipping the downloaded file gives a few files, but the one of interest is the .IntLib file. If I open that file with Altium Designer, you’ll be presented with three options on how to handle processing the file:
Figure 3: Handling an Integrated Library file
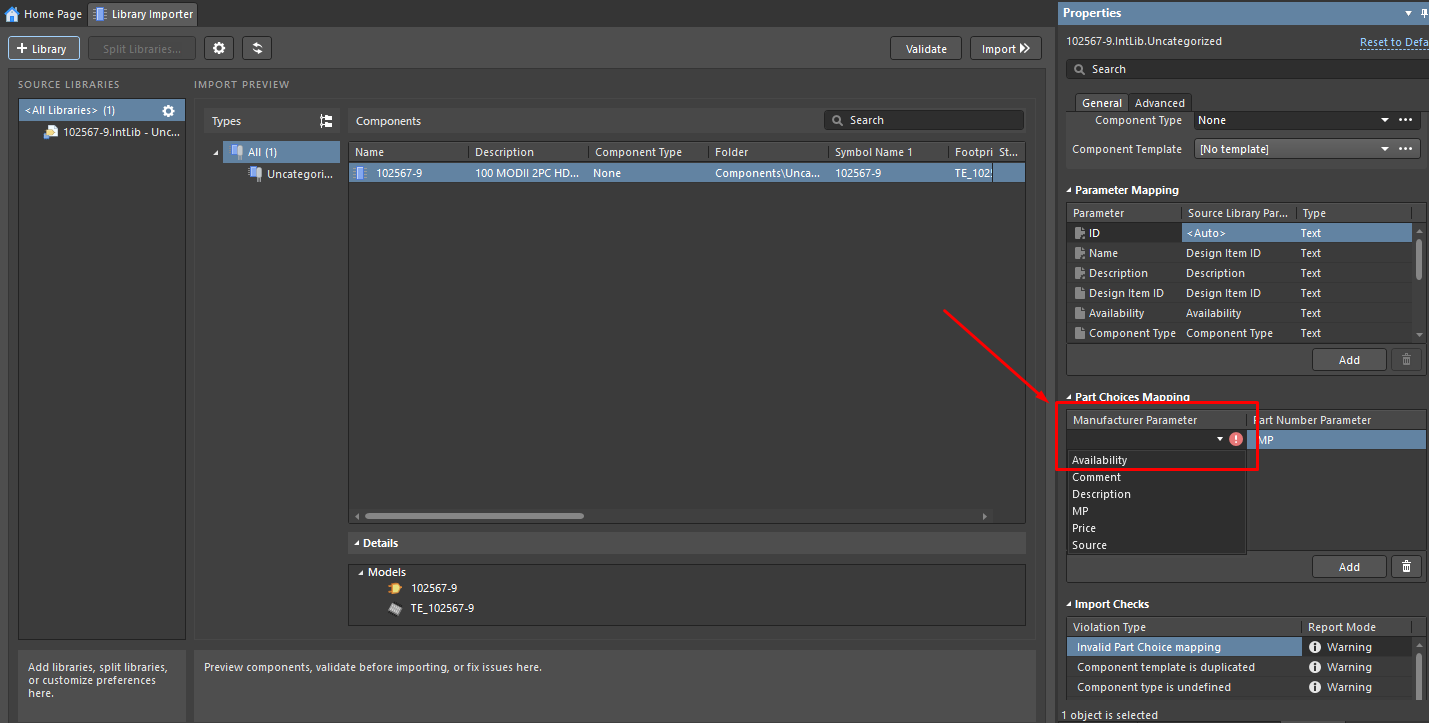
If you select the Import option, you’ll be taken to the Library Importer tool. I prefer to Extract my library and manually copy and paste these models into a newly created component. SnapEDA provides a parameter called MP that we can map to the manufacturer part number under Part Choices Mapping in the Properties panel of the Library Importer tool. Unfortunately, the Manufacturer Name parameter doesn’t exist in the SnapEDA component, so we cannot map to a component parameter.
Figure 4: Library Importer with Part Choices Mapping
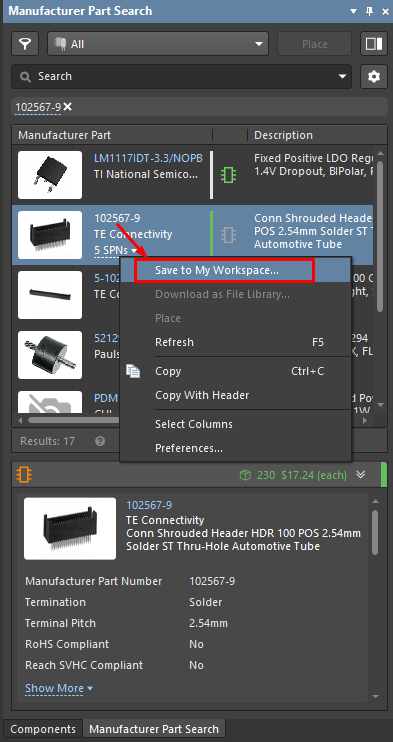
We’re going to add components the same way we did in the previous article by using the Manufacturer Part Search panel. We can add the downloaded footprint or schematic symbol before releasing the component. After searching for the part, right-click on the part and select “Save to My Workspace…” like so:
Figure 5: Add a Component via Manufacturer Part Search
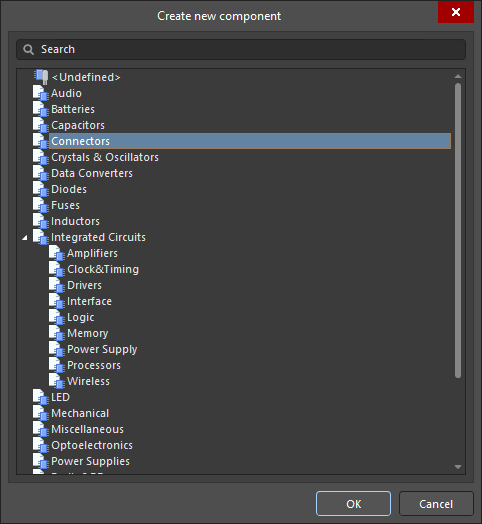
This will bring up a dialog asking you how to categorize the part. I’ve selected “Connectors” in this case since it is a connector. Remember that adequately organizing components ensures that each component type maintains the same required parameters defined in our component templates.
Figure 6: Component Category Selection
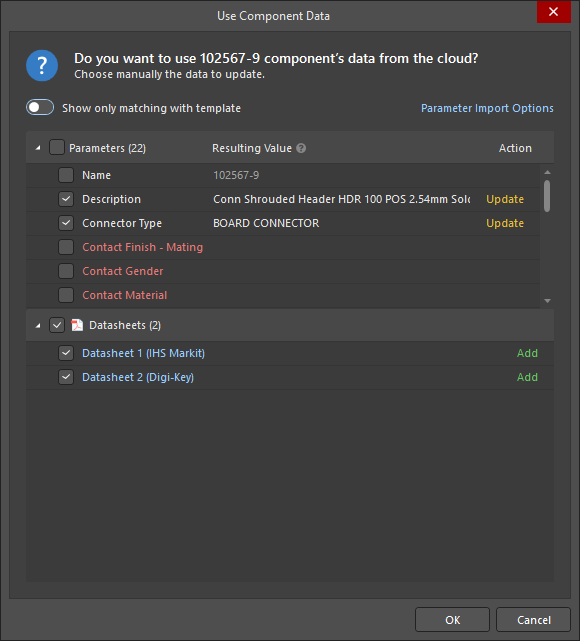
After clicking OK, another dialog will pop up showing all the data you would get from the manufacturer part search section:
Figure 7: Parameter Selection
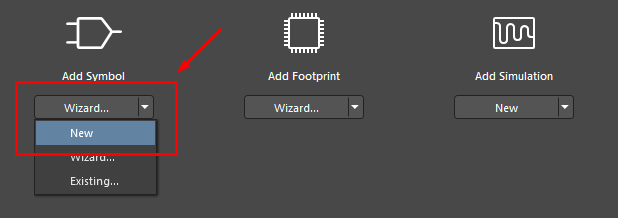
I am a big fan of all the parameters, so I check the “Parameters” box and bring everything in. Notice how there’s no symbol or footprint associated with this part. After clicking OK, we have a component definition ready to publish with everything we need except a symbol and footprint. For Symbol and Footprint, I’m going to click on the “New” button like so:
Figure 8: New Symbol Creation
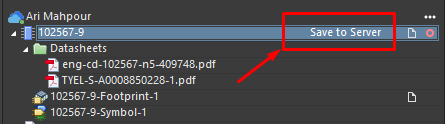
I will now copy and paste the extracted component into this new Symbol template. Open up the extracted symbol, select all using the Ctrl+A shortcut, and then Ctrl+C (to copy the existing symbol). Once you navigate to the new template, you can hit Ctrl+V to paste the symbol. Place down the component, save and then repeat with the PCB footprint. Note that with copying a PCB footprint, you need to click on the highlighted footprint after hitting Ctrl+C; otherwise, the footprint won’t be copied. Additionally, you can add a 3D STEP model by navigating to Place > 3D Body. For more details on placing a 3D body, see Working with 3D Bodies. After copying in the Symbol and Footprint, you can click on “Save to Server” and click OK (after adding release notes).
Figure 9: Saving the Component to the Server
Component Models with Plugins
You can also utilize the Symacys search tool plugin to streamline your design process in Altium Designer. To access this tool, simply open up your schematic and navigate to “File > Symbols | Footprint | 3D Models” (assuming you have downloaded and installed their plugin).
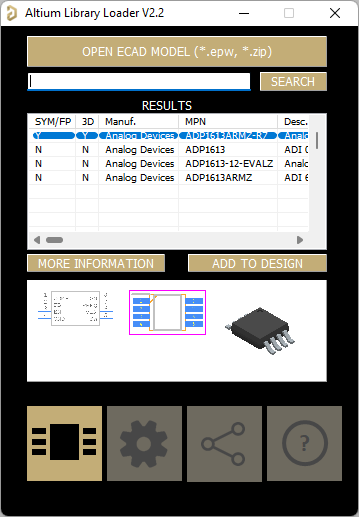
Suppose you need to locate the ADP1613 part number from Analog Devices in Altium Designer. In that case, Symacsys' Component Search Engine is an excellent resource to find the whole part, as it is not available elsewhere at the time of writing this article.
Figure 10: Component Search Engine Results
In Altium Designer, all we need to do is click on “Add to Design” and then the component will show up in the Samacsys SchLib/PcbLib files. The component creation process (including copy and paste) is identical to the one in the SnapEDA example. The only differences you’ll find are within the filenames and extensions located in the Projects panel.
Conclusion
In this article, we looked at utilizing external libraries to supplement information from the Manufacturer Part Search panel in Altium Designer. We walked through the component search process in SnapEDA and Samacsys’ Component Search Engine. Then we demonstrated how to add those components to the Component Library utilizing all the metadata from Octopart. At this point, you should now be able to leverage the free footprint libraries discussed above and avoid creating components from scratch unless necessary.
About Author
Related Resources
Related Technical Documentation
Table of Contents
Design to Release, Without the Friction
- Keep reviews tied to the right version
- Reduce handoff confusion and rework
- Spot sourcing and release risk earlier
- Work solo, share when needed
Get Started
Thank you, you are now subscribed to updates.

