


How Do I Get Started With My Altium 365 Component Library?

At a Glance
In this article Ari Mahpour reviews how to put together a component library from scratch using Altium 365.


The migration to the cloud is nothing new to the software community. Engineers in the software field have been working in collaborative cloud based environments for quite some time. As pandemic hit, all of us discovered the immediate need to migrate off our local machines and into a more centralized environment. The migration off shared network drives and onto more centralized systems became a necessity for us to collaborate more efficiently. For software engineers this was already set in motion with tools like Git hosting services, cloud hosting providers, and or collaboration tools. For PCB designers this became a bit more challenging and thus began the race to adopt systems such as Altium 365 at lightning speed.
One of the major challenges I’ve seen within the industry for new users to Altium 365 is the adoption of a centralized, version controlled library. When we’re used to having a local schematic and PCB library bundled with our projects or, at best, a centralized library on a network drive we tend to shy away from that “dreaded” migration to a centralized library that lives in the cloud. Pouring through pages of documentation can be uninviting and a daunting task. For this reason I’ve decided to write a quick guide to creating a component library in Altium 365 for the first time.
In this article we’ll walk through creating a library from scratch, adding components, and ways to enable your team to collaborate together in the process. By the end of this article you should be able to create a small library within a few minutes without much of the hassle or fuss. I’ll also be referencing Altium technical documents in case you want to do a deep dive.
Where to Begin
The Altium 365 platform allows you to store design data in the cloud for easy access from your design tools like Altium Designer or from any web browser. In this article I’ll be bouncing a little bit between both. For now let’s navigate to the web version of our Altium 365 page. Once you log into your Altium Live Dashboard you’ll notice a “Workspaces'' button at the top. Clicking on that will take you to your Altium 365 Workspace:

Figure 1: Altium Workspaces
Once I’ve clicked through into my workspace I arrive at the Altium 365 landing page like so:

Figure 2: Altium 365 Landing Page
You’ll notice a ton of resources in the “Get Started” section. Feel free to check them out. Before we dive into the component library now is a good time to add other users who want to follow along and create components alongside you. You can invite Altium users to collaborate with you and give them the “Administrators” role to get started. If you’ve opted to create your Altium 365 Workspace without the demo content you’ll notice that there will be no components once you’ve clicked the component button on the left hand side. Populating the space with the demo content will yield a bunch of components in that component list. This article is going to make the assumption that you populated your space with the demo content. You can always delete the data later or wipe the whole workspace if you so choose.
Component Creation in Altium Designer via Altium 365
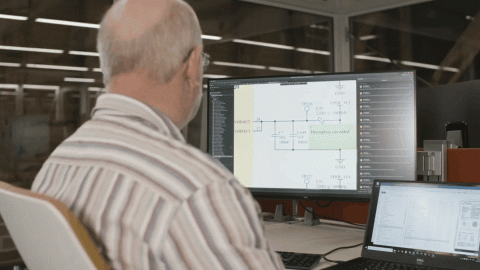
Now let’s bring up Altium Designer and start creating components. Make sure you’re logged into your Altium Live account and the Altium 365 Workspace. It can be found in the top right corner of Altium Designer:

Figure 3: Altium Live and Workspace Logins
The Explorer panel is our best friend when it comes to building libraries in Altium Designer. In the bottom right corner of Altium Designer click on Panels and then Explorer:

Figure 4: Navigating to the Explorer Panel
Notice the cloud symbol there. That means it’s pulling and pushing data to the cloud (in this case your Altium 365 Workspace). Once you open up the Explorer panel and expand the Components folder you’ll notice a series of folders (assuming you populated your workspace with the demo content). If you don’t have any component subfolders - no sweat. Just create a new component subfolder by right clicking on the Components folder and adding a subfolder like so:

Figure 5: Adding a Component Subfolder
For a deeper dive on component subfolders see this Altium Document.
Component Creation
One of the best parts of working with Altium 365 is the ability to create a library from components that are already available via Octopart. When I’m designing a board I find that over 75% of the parts I need have already been created and live within the Altium ecosystem. Let’s walk through an example.
I’m capturing my schematic and now looking to drop in an ATtiny202 microcontroller. I navigate to the Manufacturer Part Search panel and search for the part. Good news, not only is all the meta data there but the component with schematic symbol and footprint are there too:

Figure 6: Manufacturer Part Search
I can either save it to my workspace (i.e. library) or place it directly into my schematic. Saving it to my library has advantages such as making modifications, adding special parameters, or just letting the rest of your team know that this is a part that’s “approved” since it’s in your library. I always opt to save it to my library so I’ll so that and then save it in the “Processors” subfolder:

Figure 7: Saving a New Component
A new dialog will pop up where you can edit further data. You can play around with it a little or just run through the defaults and then click on the Save to Server button to release the component:

Figure 8: Releasing a New Component
If you now navigate back to Explorer > Components > Integrated Circuits > Processors you’ll see your component showing up there at the bottom. If it’s not you may need to hit the refresh button at the top:

Figure 9: Explorer with New Component
For a step by step guide on component creation have a look at the Altium 365 Getting Started Documentation or the YouTube video below from Altium Academy.
For a deeper dive you can review this doc from Altium as well.
Conclusion
In this article we created our workspace from scratch, reviewed the basic setup for component libraries, and created our first component using the Manufacturer Parts Search panel in Altium Designer. In the next article, we’re going to look at how to create components quickly, especially when you can’t find them in the Manufacturer Parts Search panel. By this point you should have enough information to get started and create your first few components in Altium Designer.
About Author
Related Resources
Related Technical Documentation
Table of Contents
Design to Release, Without the Friction
- Keep reviews tied to the right version
- Reduce handoff confusion and rework
- Spot sourcing and release risk earlier
- Work solo, share when needed
Get Started
Thank you, you are now subscribed to updates.


