


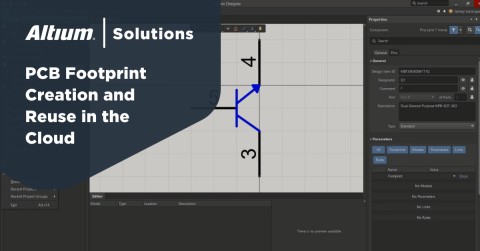


Footprint Creation Made Easy

At a Glance
Learn how to create footprint with ease using the IPC Compliant Footprint Wizard, built-in to Altium Designer. In this guide, you’ll learn how to quickly create an example SOIC-8 footprint, including automatic generation of an accurate 3D model.


Creating schematic symbols and footprints is a significant part of a PCB design engineer's tasks. With today's integrated circuits and components being housed in a plethora of packaging options, component libraries can grow to thousands upon thousands of entries. It is usually up to the PCB design engineer to create and maintain those libraries.
Let's be honest - creating schematic symbols, footprints, and general library maintenance is usually a tedious, repetitive task that - due to predominantly manual methods - is rather error-prone.
Broadly speaking, the workflow is selecting a part required for the schematic, creating a schematic symbol, manually extracting information from the part's datasheet, creating a land pattern, finding or creating a suitable 3D model, and finally adding structured parameters to the libraries (name, description, part numbers, and so forth). Quite a long-winded process!
Not to worry, however - Altium Designer features an extremely useful tool - the 'IPC Compliant Footprint Wizard', which follows the IPC-7351 standard for footprint creation. This tool significantly reduces the time it takes to create footprints and mitigates human error effectively. In addition, the wizard automatically creates detailed 3D step models and integrates them seamlessly into your footprint libraries.
The IPC Compliant Footprint Wizard lets you create footprints in only a few minutes for a large selection of standard component types, such as passives, QFN, SO, BGA, and much more.
In this blog, we'll examine some key features and how to use Altium Designer's IPC Compliant Footprint Wizard by following a sample footprint creation. Let's get started!
Example Part and Datasheet
To keep things simple, we’ll create our own surface-mount SOIC-8 footprint using the IPC Compliant Footprint Wizard. The ideas and general workflow apply very straightforwardly to more ‘complex’ footprints. As you’ll see, the wizard guides us through the process along the way, and this process varies only slightly between package types.
The SOIC-8 package is extremely common, easy to handle and solder. As the name suggests, it is the 8-pin variant. We’ll look at the NE5532DR op-amp, which uses the SOIC-8 package.
Typically, we would import the land pattern dimensions to create our footprint. However, we require the package dimensions for the IPC Compliant Footprint Wizard. The wizard then automatically calculates the required pad, STEP model, courtyard, and other relevant dimensions.
Let’s open the NE5532DR datasheet and navigate the Package Outline page. Any datasheet will contain information on package dimensions and suggested land patterns (footprint).

The package outline page tells us everything we need to know. For example, pad pitch, pad dimensions, body dimensions, stand-off height, and so on. Units are usually given both in metric and imperial and the IPC compliant footprint wizard supports both (we’ll stick with metric for this tutorial).
We’re ready to create our footprint now. In Altium Designer, create a new footprint library, or open an existing footprint library. Once open, navigate to the top menu bar and select ‘Tools’ 🡪 ‘IPC Compliant Footprint Wizard’.
Entering Package Dimensions
Let’s go through the footprint wizard together. Although, as you’ll see, the wizard is very self-explanatory!
On the title page, click ‘Next,’ then select the desired package and units (SOIC, in our case). Take a moment to check out all of the footprints the wizard is capable of creating – pretty cool!
Following that, we need to enter the package dimensions, including the number of pins and lead dimensions. Don’t worry – these are the only parameters we truly have to enter, and all we need to do is copy the information from the datasheet.
The middle of the page also guides you on the relevant parameters and how they are measured. Often, the datasheet will have the same lettering for a given parameter (for example, the maximum height is given the letter ‘A’).
Copy over the package dimensions to match the screenshot below. Another neat feature is that the footprint wizard creates a 3D model preview in real time. Select the ‘Generate STEP Model Preview’ checkbox to see this. Then click ‘Next.’

Optional Data
The next few screens presented by the footprint wizard let you adjust optional parameters, for example (page-by-page):
- thermal pad,
- heel spacing,
- board density,
- tolerances,
- pad dimensions,
- silkscreen line width,
- and courtyard information.
Our simple package does not need to adjust any of this information. However, remember that this is very application specific.
Final Steps
We need to give our new footprint a name and description. The wizard has already filled in this information for us (by checking ‘Use suggested values’).
Finally, we are asked where to store our new footprint. Select ‘Current PcbLib File,’ and don’t forget to check ‘Produce 3D/STEP model’ and the option to ‘Embedded.’ Then click ‘Finish.’

In a matter of only a few minutes and with minimal data entry, our brand new SOIC-8 footprint, complete with all required information and an accurate 3D model, has now been added to our library.
Hopefully, this blog post showed you the power and simplicity of the IPC Compliant Footprint Wizard featured in Altium Designer. Footprint creation doesn’t get much easier than this!
Don’t forget to check out this blog’s accompanying video on the top. It goes into more detail and guides you through the IPC footprint wizard step-by-step.

About Author
Related Resources
Related Technical Documentation
Design to Release, Without the Friction
- Keep reviews tied to the right version
- Reduce handoff confusion and rework
- Spot sourcing and release risk earlier
- Work solo, share when needed
Get Started
Thank you, you are now subscribed to updates.