


Getting Started with the Orange Pi 5 and the Rockchip RK3588 Processor


The Orange Pi 5, powered by the Rockchip RK3588 processor, has quickly gained popularity as a major contender to the Raspberry Pi 5. Packed with a quad-core ARM Cortex-A76, quad-core ARM Cortex-A55, Arm Mali-G610 MP4 GPU, and an NPU, this board is a total workhorse. It’s sometimes hard to know where to start, so in this guide, we will take you through the essential steps to get the Orange Pi 5 up and running. We’ll cover how to download, install, and run a custom image called ubuntu-rockchip on your Orange Pi 5, ensuring smooth performance for your projects.
Hardware Overview
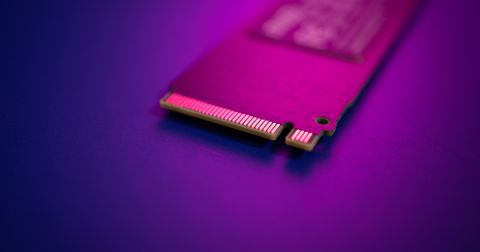
With a 2.5 GbE Ethernet port, multiple HDMI ports at 8K resolution, a built-in M.2 slot for a PCIe 3.0 SSD, and support for WiFi 6E, this board stands out over all the other contenders in this space. With a dedicated GPU, the graphics and video acceleration on this little guy are killer. A dedicated neural processing unit (NPU) gives us the ability to perform complex math (such as matrix multiplication) for neural networks (as we’ve seen in Understanding Neural Networks and Building Neural Networks on FPGAs). With all of these goodies (and the standard single-board computer peripherals) we’re able to do a lot with this little device.


Choosing an Image
When it comes to picking an image (or operating system in this case) for the Orange Pi, it’s not 100% straight forward. Orange Pi has an official image that they provide but there have been mixed reviews about the support. Armbian is another operating system for the Orange Pi but not targeted specifically for the Rockchip 3588 (i.e. supports many different chips). Based on my research and experience, I decided to go with ubuntu-rockchip which is Ubuntu built specifically for the Rockchip 3588 processor. I also opted for the latest version of Ubuntu (24.04 at the time of writing this article) to leverage all the latest software packages.
Setting Up the Orange Pi 5
Before diving into the software side, you’ll need to have the following hardware ready:
- Orange Pi 5 board (I bought the Orange Pi 5 Max)
- Keyboard, mouse, monitor, and HDMI cable
- USB-C Power Supply (I bought a 5A version to also use with my Raspberry Pi 5)
- Ultra-fast SD card (at least 16 GB) such as the SanDisk Extreme
We’ll need to hook up the keyboard, mouse, and monitor to the board. There’s no switch for the power supply so hold off on plugging that into the device. Before we turn on the device we need to first flash the MicroSD card.
Flashing the MicroSD Card
Before flashing the MicroSD card we’ll need to download the official image. I opted for the full experience: Ubuntu 24.04 LTS Desktop with Linux 6.1 and I recommend you do as well if you’re a first-timer. After downloading the image we’re going to open up balenaEtcher and flash in three easy steps:
- Flash from File: Navigate to the file you just downloaded (no extraction necessary)
- Select the target: Select the MicroSD card that you inserted into your computer
- Flash: Click the flash button and go

Once flashing has completed you can eject your MicroSD card, load it into the Orange Pi, and power it on by plugging in the USB-C cable from the power adapter.
Initial Setup and Configuration
When you boot up for the first time it may take an extra minute or two before something shows up on the screen. It’s completely normal for the initial boot to take longer than the usual boot time. After the system boots up you’ll be brought to Ubuntu’s GNOME (user interface) that will walk you through setting up your time zone, locale, and WiFi. After completing those steps take a moment to explore the operating system a little bit.
Once you’ve completed the setup wizard, it’s important to update your system to ensure you’re running the latest software.
1. Open the Terminal: Use the shortcut Ctrl + Alt + T to open the terminal.
2. Run System Update Commands: sudo apt update -y && sudo apt upgrade -y
This will update all your packages to their latest versions. After the updates are complete, restart the system by typing: sudo reboot
After rebooting feel free to open up Chromium and bring up some sample video tests. I, personally, like this one (even though it’s pretty old) but feel free to peruse the web for more ways to test out your GPU. Notice that the chip will get pretty warm when running compute-intensive processes. You may want to invest in a heat sink and/or case with a fan if your Rockchip 3588 processor is getting overheated.
Conclusion
In this article, we’ve walked through setting up your Orange Pi 5 with ubuntu-rockchip. We stepped through the peripherals, flashing the MicroSD card, and bringing up the basic operating system. In the next article, we’ll delve deeper into harnessing the Rockchip RK3588’s powerful hardware for advanced applications.
About Author
Related Resources
Related Technical Documentation
Table of Contents
Design to Release, Without the Friction
- Keep reviews tied to the right version
- Reduce handoff confusion and rework
- Spot sourcing and release risk earlier
- Work solo, share when needed
Get Started
Thank you, you are now subscribed to updates.