


High Speed PCB Layout Guidelines: Placement Tips and Strategies


In real estate, the buzzword is; “location, location, location”. Interestingly enough, the same can be said of high-speed PCB layout. Although all aspects of the high-speed PCB design process are important, component placement is especially important for ensuring easy routing, minimizing EMI, and possibly eliminating the need for some extra layers. Location placement methods that work without a problem in a standard PCB design may not satisfy the critical signal flow requirements of a high-speed design. For the design to work, it really is all about “location, location, location”.
Here are some tips and strategies to consider when creating your high-speed PCB layout. First, we will look at some basic component placement considerations for high-speed designs followed by the benefits of creating a floor plan before placing components on the board. Lastly, but certainly not least in importance, we will discuss termination resistors and where they should be placed.
Part Placement in Your High-Speed PCB Layout
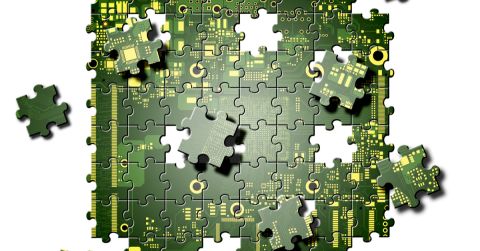
Any PCB layout is like a difficult puzzle to solve, with many competing objectives. Oftentimes, you have some form factor constraints and layer count objectives you need to meet, and you need to ensure parts are placed in such a way to satisfy these constraints and many more.
Parts in a high-speed PCB layout should generally be arranged in the following ways:
- Grouped by circuit block: First, group components that perform specific tasks in the system together. As an example, all the components that play a part in power regulation should be grouped together.
- Grouped around large processors: These components tend to have a high I/O count and will interface directly with your grouped circuit blocks. Try to arrange the first-level circuit blocks around your central processor, and then try to arrange the downstream blocks around those.
- Grouped by access to routing channels: If you have a set of components that need to access a common interface on another component, try to arrange these components so that their pins face each other. This won't always be possible, but if you're successful you won't need to route through internal layers or in long paths around other components.
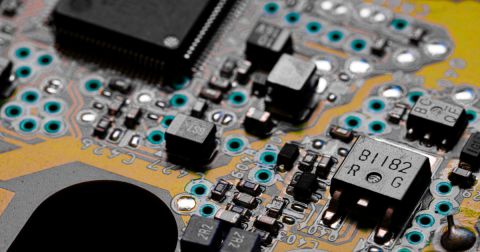
In the image below, you'll see a large MCU in the right-most area of the layout, and there are other components grouped around it with their pins facing the MCU. Farther to the left, we can see that there are secondary components like connectors, LEDs, and some passives. Notice that these are roughly lined up to face one side of the MCU. This enables some routing directly from the MCU to those board regions on the left side of the board.
High-speed PCB layout example
When planning out the of placement functional blocks of circuitry, keep in mind the power and ground plane needs as well. Using continuous power planes is usually preferred, but in the event that the needs of the design necessitate a split power plane for multiple voltages, exercise caution when placing connected components across the split. High-speed transmission lines should not cross splits in power planes as that will break up the return path for those signals. Also, avoid placing other components that are not part of a circuit between components of that circuit. This too will affect the return path for that circuit.
Let’s look a bit deeper at part placement for different component blocks, connectors, and other circuits.
Preparing for Location Placement by Floorplanning Your Layout
Creating a floor plan for your location placement is an effective way to prepare a high-speed PCB layout. By planning ahead, you can account for groups of components as mentioned above, rather than being surprised as they are placed at the very end of the design.
Functional Blocks
Functional blocks of circuitry such as power, RF, digital, analog, etc., should be organized and placed as groups in order to minimize signal crossing. A pre-placement floor plan will allow you to see what the signal flow between functional blocks is and how best to plan for it. For instance, group your low-frequency analog together as much as possible so that high-frequency or high-speed signals do not have to cross through sensitive areas of analog circuitry.
EMI and Connectors
You should avoid placing sensitive high-speed devices close to the edge of the board. This is because the edge of the board can act like an open cavity that allows electromagnetic radiation to escape the edge of the board, meaning there can be more electromagnetic interference (EMI) that impacts other components in your system.
Any cables your board needs to data or power will need to reach a connector in your board, and these can radiate EMI. Therefore, it's usually a good idea to try and separate your connectors and high-speed components, high-speed digital functional blocks, and high-frequency analog blocks. Most guidelines state that you should place connectors closer to the board edges and sensitive high-speed devices closer to the board center to reduce EMI in your design.
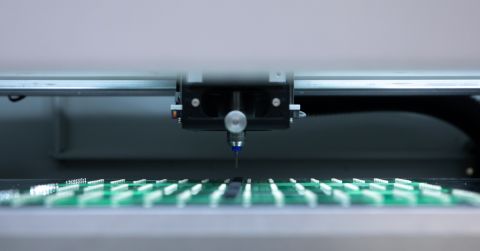
High-speed edge connectors for PCIe cards.
Heat Management
Thermal effects are another aspect of high-speed design placement to consider. This is because high-speed layout guidelines expect that devices may run at higher temperatures than standard components. To ensure that your hot components placement stays cool, plan your placement so that these components receive an unrestricted airflow. For example, don’t place taller components, like connectors, in the direction of airflow to a hot BGA.
Termination and Impedance Matching Networks
The final and most specific placement strategy is considering the location placement of your termination resistors. High-speed PCB designs may need some termination applied at the source end or receiver end of an interconnect, depending on the port impedances of the components and the impedance you need to match. These resistors are often treated as an afterthought drop-in once the main portions of the circuitry have already been placed. Since these resistors are part of the circuit as a whole, their placement is extremely important for it to function correctly.
No matter where you want to put your high-speed components, you'll need to make room somewhere for any required termination resistors. So where should a designer place termination resistors, and what effects will this have on signal behavior? First, we need to consider whether we're adding termination resistors in series or parallel.
Parallel Termination (Pull-up, Shunt, or Thevenin)
Parallel termination is normally used to shunt the load end of a transmission line to the ground when the load component has high input impedance. Sometimes, a pull-up resistor is used to adjust the signal level to accommodate the receiver. Shunt and pull-up resistors are sometimes used together, called Thevenin termination, which adjusts the signal level at the receiver and sets the load's input impedance to match the transmission line impedance. Check your component datasheets to see which termination method you should use in your designs.

This scheme puts one side of a termination resistor on the end of the circuit closest to the receiver while the other side is tied to the power or ground plane. The greater the trace length from the load pin to the resistor, the more the circuit is prone to signal reflection resulting in signal degradation. This is why parallel resistors should be placed as close as possible to the load pin of the receiver, and they should have an immediate connection back to the power/ground plane through a via.
Series Termination
The purpose of series termination is to set the driver's output impedance equal to your interconnect impedance. In this termination scheme, a resistor is placed immediately on the output pin of the driver. Since the resistor is very close to the driver's output pin, the input impedance seen by the driver will be approximately equal to the transmission line input impedance.

High pin count components, such as BGA packages, will generally not require termination on every single driver pin. Certain interfaces may have on-die termination, so an external termination resistor won't be required. For those pins that do require series termination, there needs to be some available room around the outside of the component to apply termination. However, placing multiple series termination resistors for a large-scale device will take up a lot of board space around the device. This will require planning ahead to make sure that adequate space is available without having to rip up and replace tracks in your high-speed PCB layout.
No matter which type of termination you need to apply, place the resistors close to the components they are terminating. Do not place them in the middle of a transmission line. Learn more about these termination methods in this article.
Fan-in/Fanout
Routing into and out of components is an important part of high-speed PCB layout and routing. Components like quad packs are easy to route into as long as the traces are sized correctly. Traces should ideally be sized such that they can route into pads with minimal neck down when there is an impedance specification. If the interface has an impedance requirement, it's best to try and design the stack up so that your trace width will match to the pad size on the components. If this can't be done, such as for cost reasons, it will require neck down or coplanar routing with the nearby copper pour. Coplanar is usually impractical, so it's best to just try to hit the target width.
We prefer to keep neck down short on impedance-controlled buses due to the requirement to calculate a critical length. In my opinion, the best practice is just to design the stack up such that the 50 ohm trace width requirements already match the trace width to the pad size. This gives you the best result where neck down is eliminated completely. In buses where there is no impedance specification, don't worry about it unless the routing becomes very long or you're routing onto a cable.
What about BGAs? BGAs are one component package where neck down is sometimes needed on impedance-specified buses in order to get a trace between pads. If you're designing with a BGA, then you are probably already pushing capability limits anyway, even in BGA packages with a 1 mm pitch. The pitch creates a pad size requirement, and this creates a trace width requirement in order to maintain clearances.

To make sure you can hit the trace with a requirement on impedance-specified buses, you will most likely need to use a thinner laminate material. BGAs with impedance-specified interfaces push dielectric thicknesses smaller when the pitch gets smaller. To understand this better, learn more about BGA fanouts in this article.
Floorplanning and other strategies that we’ve talked about will give you a great start when you're creating your high-speed PCB layout. The best high-speed PCB design tools can help you with the placement as well as many other aspects of the design. Professional PCB design software, like Altium Designer®, has the right tools for the job.
Would you like to find out more about the different high-speed layout guidelines and capabilities that Altium offers its users? Talk to an expert at Altium.

About Author
Related Resources
Related Technical Documentation
Table of Contents
Design to Release, Without the Friction
- Keep reviews tied to the right version
- Reduce handoff confusion and rework
- Spot sourcing and release risk earlier
- Work solo, share when needed
Get Started
Thank you, you are now subscribed to updates.

