


How to Start an FPGA PCB Layout For Your Embedded System

At a Glance
FPGAs are key elements that aid innovation in advanced embedded systems where ready-made SoCs may not be available. See why you should use an FPGA in your embedded system.


FPGAs come in quad or BGA packages that can be difficult to floorplan, especially with the high number of I/Os often implemented in these components. FPGAs offer a lot of advantages in terms of their reconfigurability, but they can require a lot of effort to layout and route without headaches. If you’ve never worked with an FPGA in your PCB layout, we have some guidelines that can help you get started.
Creating an FPGA PCB layout is mainly difficult because it requires significant floorplanning that must match the overall system design. The FPGA system design can dictate where some components need to be placed and routed in the PCB layout, and vice versa. If you’ve already floorplanned your system layout, then you will likely have an easier time building your application and implementing it on an FPGA successfully. To get started, we’ll look at how to think about the stackup and routing channels in your FPGA as these points will drive a lot of choices in the PCB layout.
Stackups and Routing in an FPGA PCB Layout
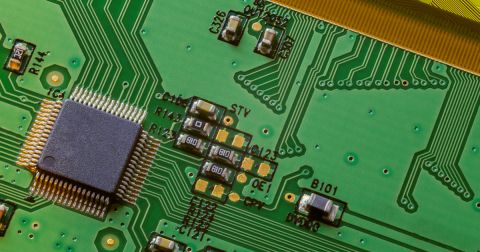
To get started with an FPGA, it’s important to note that today’s advanced FPGAs with moderate to high I/O count come in BGA packages. FPGAs in QFPs are also available, but the most advanced components will be available in BGA packages. The reason for this is simple: you can fit a lot more I/Os in a BGA package, and you can reduce component size if an FPGA is packaged in a BGA.
So to get started, make sure you design the stackup for your FPGA PCB layout meets a few simple requirements:
- Interleave power and signal layers with ground layers in the PCB stackup
- Use the standard method in BGAs to determine the required number of signal layers for routing (Signal layers = # of rows with signals/4)
- For high-speed I/Os, make sure you make the outer layer thin enough to eliminate the need for neck-down
- Use ground planes and/or use ground fill to support high-speed routing with impedance control
The guidelines stated here apply to any BGA, but they are quite important in FPGAs. An FPGA is often used because it grants access to multiple high-speed interfaces that are unavailable in a slower component like an MCU/MPU. Even in sub-mm pitch BGAs, you aren’t required to implement HDI design practices, but you should still implement a stackup that enables the type of routing you need to ensure signal integrity, power integrity, and EMC.
Example Stackup
The stackup shown below provides multiple routing channels on multiple layers. If there are more than two rows/columns of I/Os on the FPGA, then you will have to dedicate multiple signal layers to these I/O groups. Additional layers can be added to support other signals not dedicated to the FPGA, or to other interfaces (analog, SPI, etc.).

In this stackup, we’ve taken the best steps available to provide isolation in different channels, provide enough room and layers for routing power, and plenty of ground to control return paths. The interleaving of ground layers between signal and PWR is very important as it provides the return path control needed to ensure EMC requirements are satisfied. In this stackup there is only 1 power layer listed, although power could also be routed on signal layers as needed to make connections with smaller rails. Higher current systems can use multiple power layers in parallel if needed.
SOM Board-to-Board Connector Fanout
The FPGA will generally be placed away from the edges of the board so that routing channels can be extended outward. However, there is an alternative method for placing an FPGA. Instead of placing the FPGA as a component, it may be available on a system-on-module (SOM) from the part vendor or from a 3rd party company. Placement as an SOM requires fanning out board-to-board connectors that can have very high pin count. An example is shown below.

Depending on the board-to-board connector footprint, you may need some fanout strategy and design rules you might use on an FPGA. It’s common to see multiple connectors grouped in a square arrangement around the SOM board or at the edges.
Planning for Routing
As we can see from all the discussion above, effective PCB layout and routing with an FPGA is all about working with BGAs, so the same routing strategies used in other BGAs will apply in FPGAs. There are some simple strategies that are needed for routing signals out of a large FPGA:
- Make sure your FPGA’s BGA footprint is correct and complies with DFM requirements
- Select the appropriate fanout for your BGA so that signals can reach pins
- Carve out channels on each layer where specific interfaces will be routed
- Arrange peripherals around I/Os to prevent back-and-forth routing around the board
- Take advantage of your design rules to ensure impedance control
- Set your differential pair geometry so that impedance is dominated by trace-to-ground spacing, not trace-to-trace spacing
Other placement challenges would normally involve placement of capacitors on power pins around the FPGA to provide decoupling. With BGA packages, this is much more convenient because you can place those capacitors across pins on the back side of the FPGA. Make sure you specify via-in-pad in your fabrication documentation if you are using larger case capacitors. If you are working with some of the fastest signaling standards, then you should opt for smaller package sizes (sub-0402) to ensure fastest possible response in your decoupling network.

For very high speed signals, where precise length matching is needed across a large parallel bus (like DDR4 or higher) and between multiple differential pairs (like in PCIe), you will need to include flight times across the FPGA. Physically large FPGAs might require signals to travel across the component in order for a signal to leave a logic block and reach an I/O pin. Sometimes, these are on opposite sides of the FPGA, so there will be a large propagation delay added into the signal’s travel time. This additional flight time can be included in the pin-package delay information for the FPGA. If your signal is transitioning through a via, don’t forget to include the via delay (see the previous link).
When you need to place an FPGA in your PCB layout and route signals to other components, use the best set of PCB layout features in Altium Designer®. Once you’ve completed your PCB and you’re ready to share your designs with collaborators or your manufacturer, you can share your completed designs through the Altium 365™ platform. Everything you need to design and produce advanced electronics can be found in one software package.
We have only scratched the surface of what is possible to do with Altium Designer on Altium 365. Start your free trial of Altium Designer + Altium 365 today.

About Author
Related Resources
Related Technical Documentation
Table of Contents
Design to Release, Without the Friction
- Keep reviews tied to the right version
- Reduce handoff confusion and rework
- Spot sourcing and release risk earlier
- Work solo, share when needed
Get Started
Thank you, you are now subscribed to updates.

